Jupyter usage
Slurm
Word of advice
Jupyter notebooks are a great way to prototype or setup your more complex Python or even Tensorflow workflows. However, due to its interactive nature it is not suitable for running long calculations or train AI models in a JupyterHub/Lab session. Lucky for you, you can easily submit your Jupyter notebooks to Slurm.
Let us assume you finished your Tensorflow workflow for example as Jupyter notebook and you tested it for functionality. Now you are ready to submit the production run to the Slurm queue.
#!/bin/bash

#SBATCH --time=10:00:00
#SBATCH --mem=40G
#SBATCH --ntasks=1
#SBATCH --job-name=Tensorflow-training
#SBATCH --partition=clara
#SBATCH --gres=gpu:v100:1

module load JupyterLab/1.2.5-fosscuda-2019b-Python-3.7.4
module load TensorFlow/2.4.0-fosscuda-2019b-Python-3.7.4
jupyter nbconvert --to notebook --execute Tensorflow.ipynb --output tf-job-%j.ipynb
How to use your own environments and kernels
Following here are two quick methods (using conda and using pip+venv) you can use to set up your own individual environments.
Using conda
-
Create a conda environment
-
Install the ipykernel
-
Log out of JupyterHub and back in again, maybe you need to restart your session
- Enjoy the new environment in JupyterHub
Using pip + venv
-
Create a virtual python environment
-
Install the ipykernel
-
Log out of JupyterHub and back in again, maybe you need to restart your session
- Enjoy the new environment in JupyterHub
Using modules in a custom Jupyter environment
We provide a collection of commonly used software. This also includes packages that can be used with Jupyter and Python.
This tutorial takes you through the steps to set up your own version-specific virtual Python environment to use in Jupyter notebooks and the available software modules for that version.
Setup Python 3.7 environment
Connect to one of the login nodes, e.g.
Next, you need to load the Python module in the specific version you need. In this case it is version 3.7
If this is your fist time setting up a virtual environment, you need to create a directory to store your environments in.
The following command will create a directory named venv in your home directory.
Now you are ready to create your virtual environment. To do that issue the following command:
This will create a subdirectory py37 in the aboved created directory containing the basic files and links.
To use the newly created virtual environment it needs to be activated.
To check if everything works as expected check if you get similar results using these commands.
Add virtual environment to Jupyter
To make Jupyter aware of your newly created virtual environment you need to install ipykernel and add the kernel to Jupyter.
Using pip you can easily install the required package and all its dependencies.
Using the following command you create a new button in your JupyterLab Launcher named Python 3.7 (user).
Using new environment in Jupyter
Now you can use your browser and login to JupterHub on https://lab.sc.uni-leipzig.de
Remember
Load the same modules you used to create your virtual environment, before opening a new notebook.
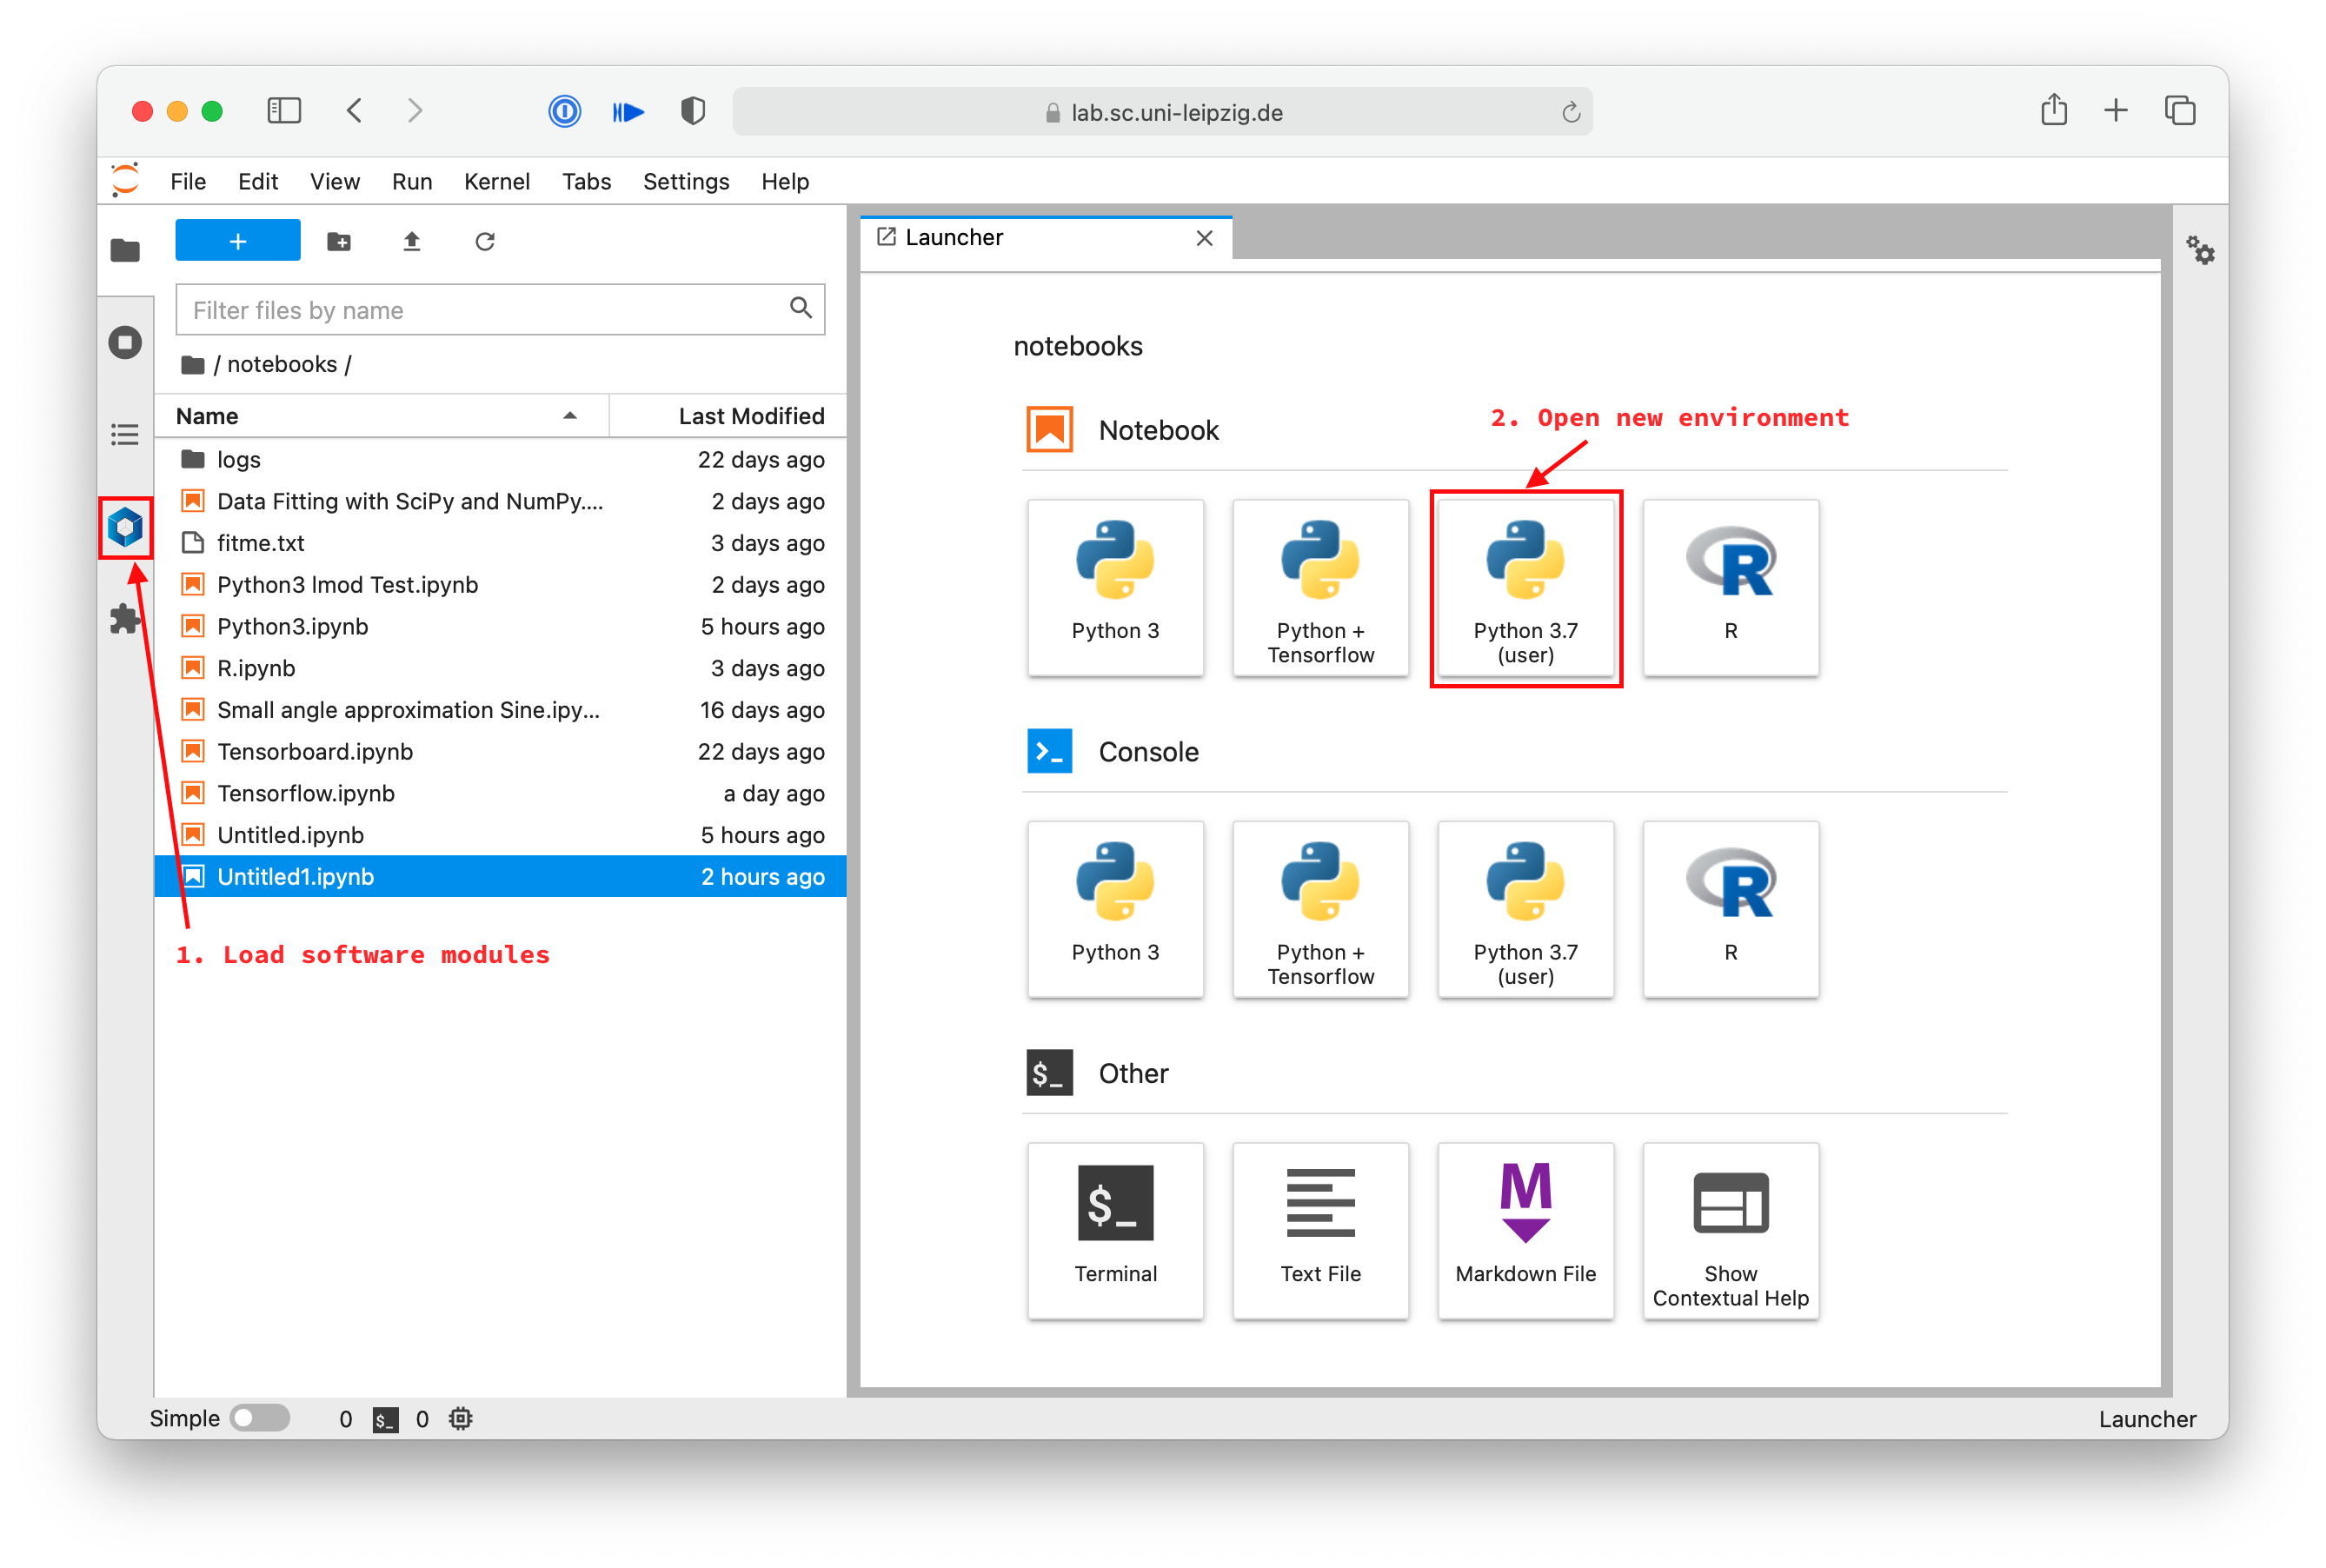
You can now click on the blue hexagon button in the sidebar (marked 1. Load software modules below) to open the software selection tool.
Here you can load the modules you need in your notebook.
NOTICE
Only Python modules with the same major and minor version of your environment will work. In this example you can load modules with Python 3.7.* in their name.
In your launcher you should also find a new button with the name you have chosen in the previous step.
In the image above, marked with 2. Open new environment.
Double clicking this new button opens a notebook in this new environment.
Example PyTorch
If you want to use PyTorch in your notebook.
First search for PyTorch in the software list.
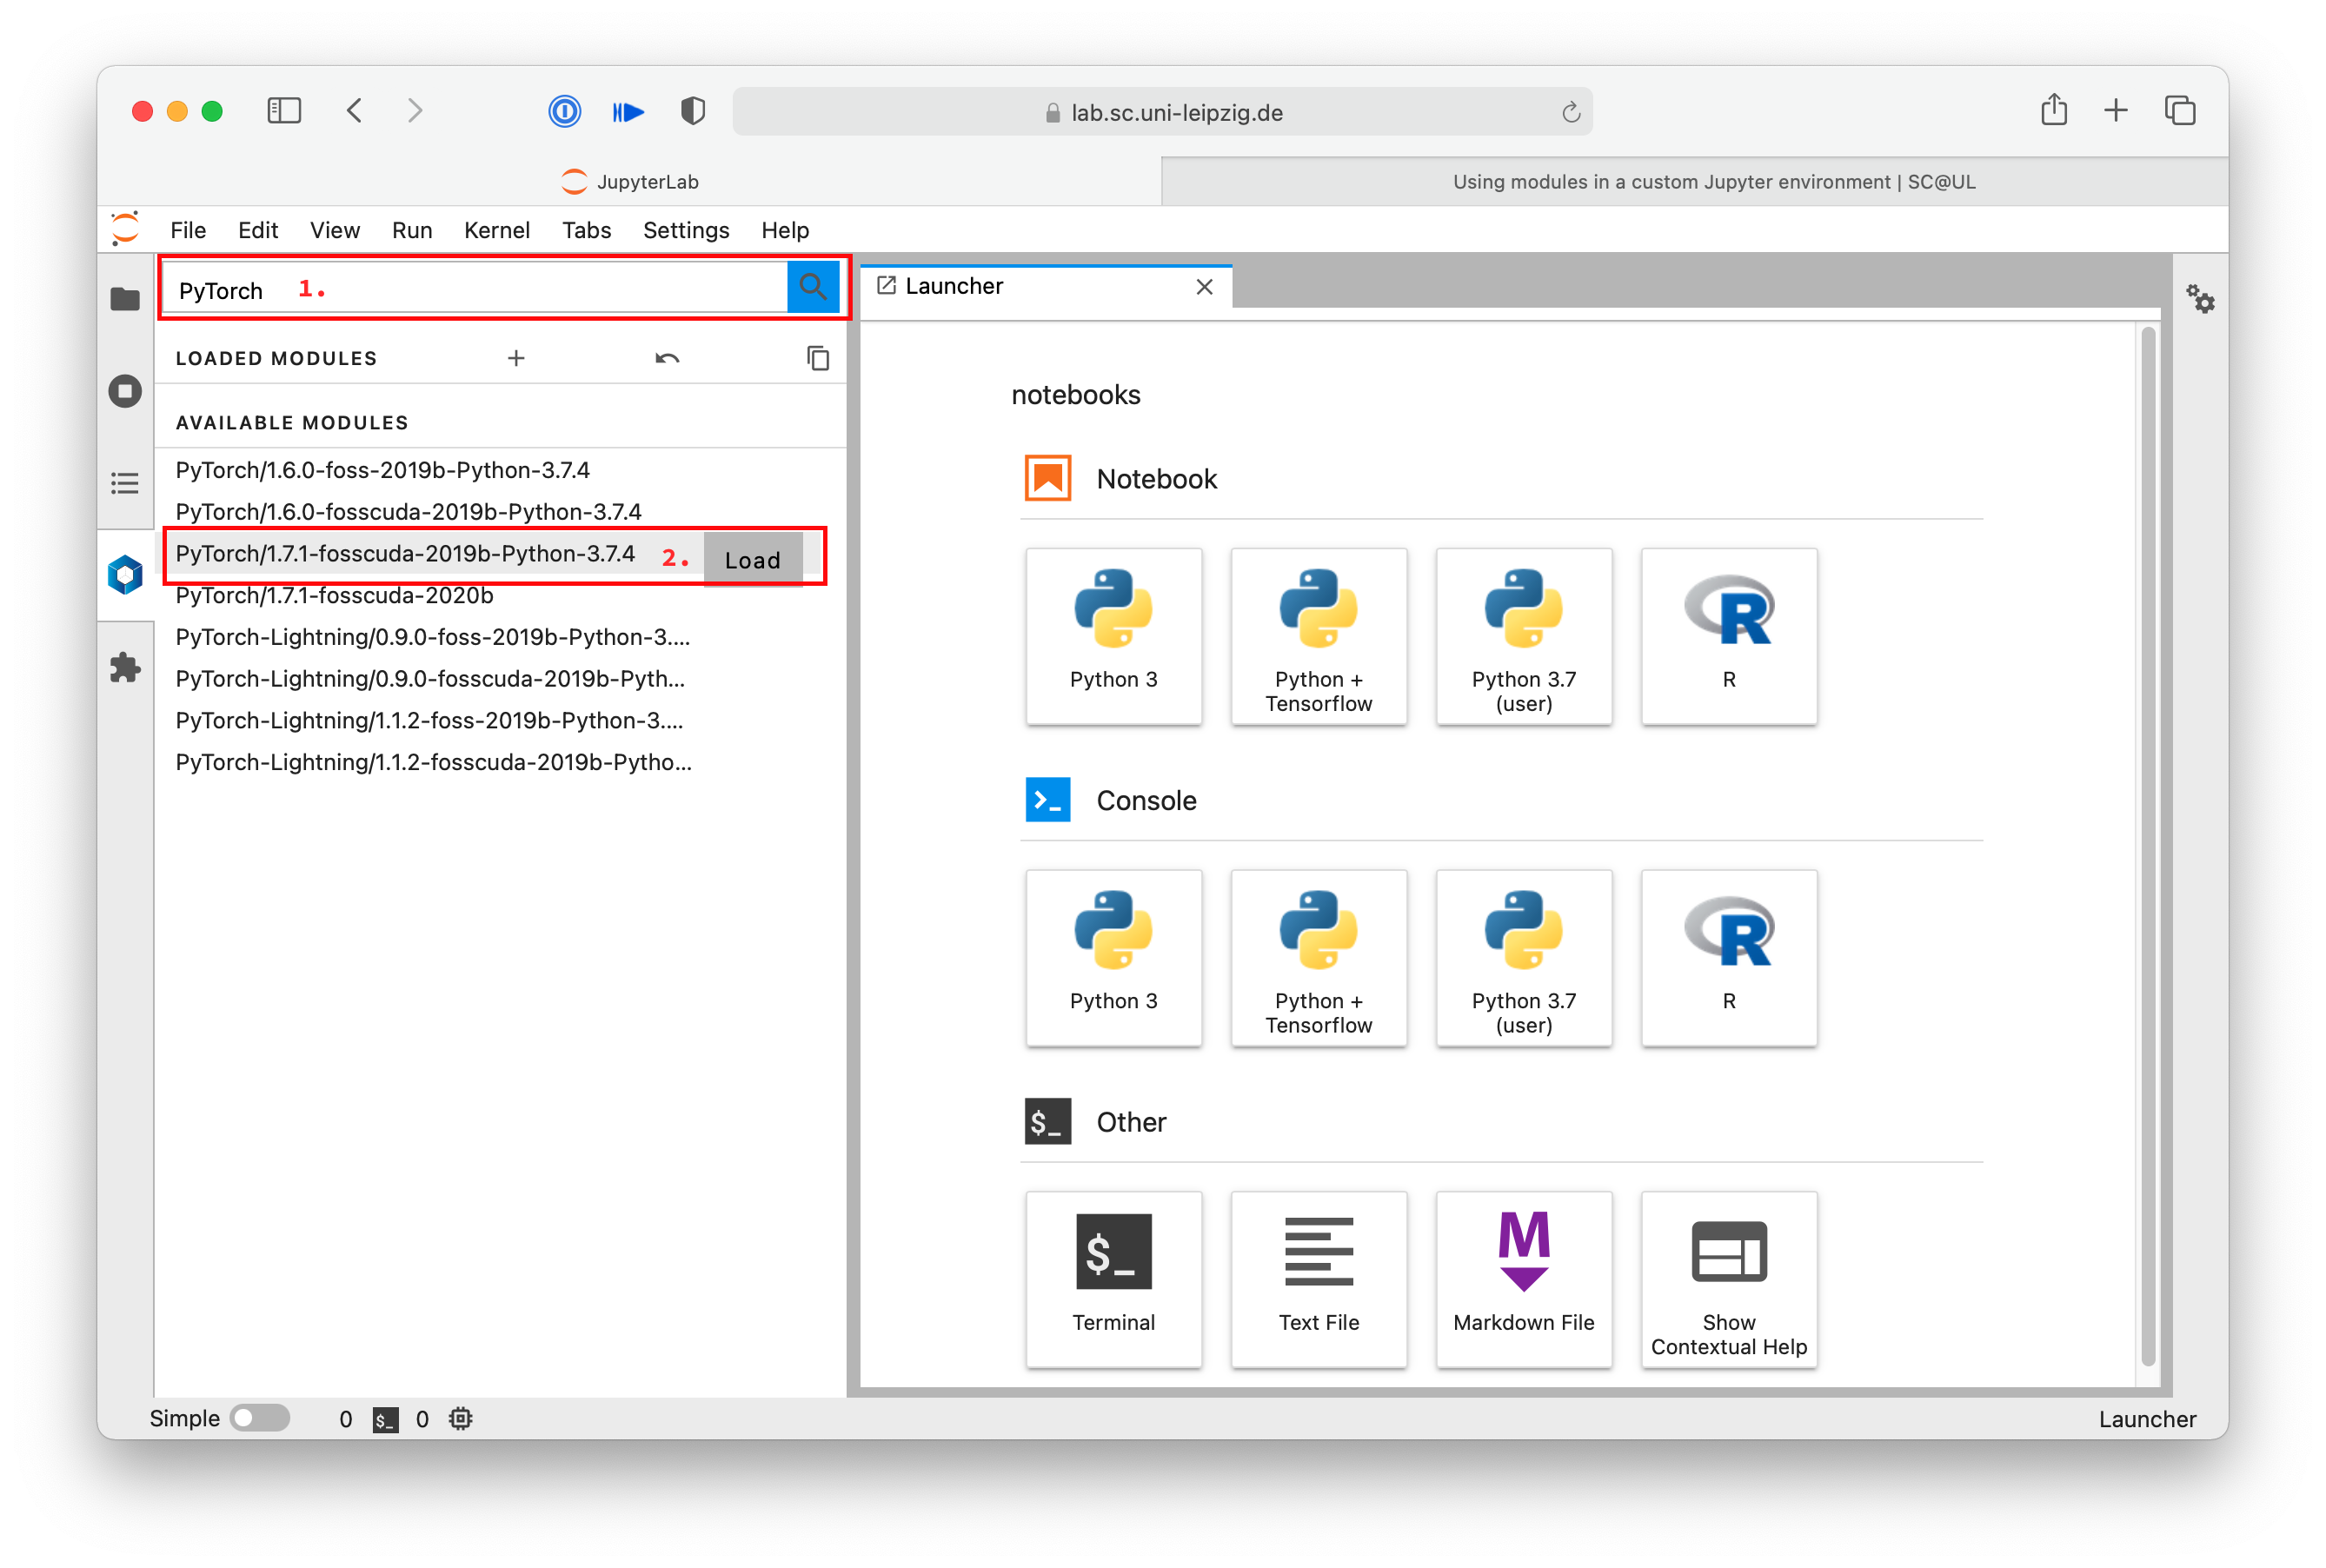
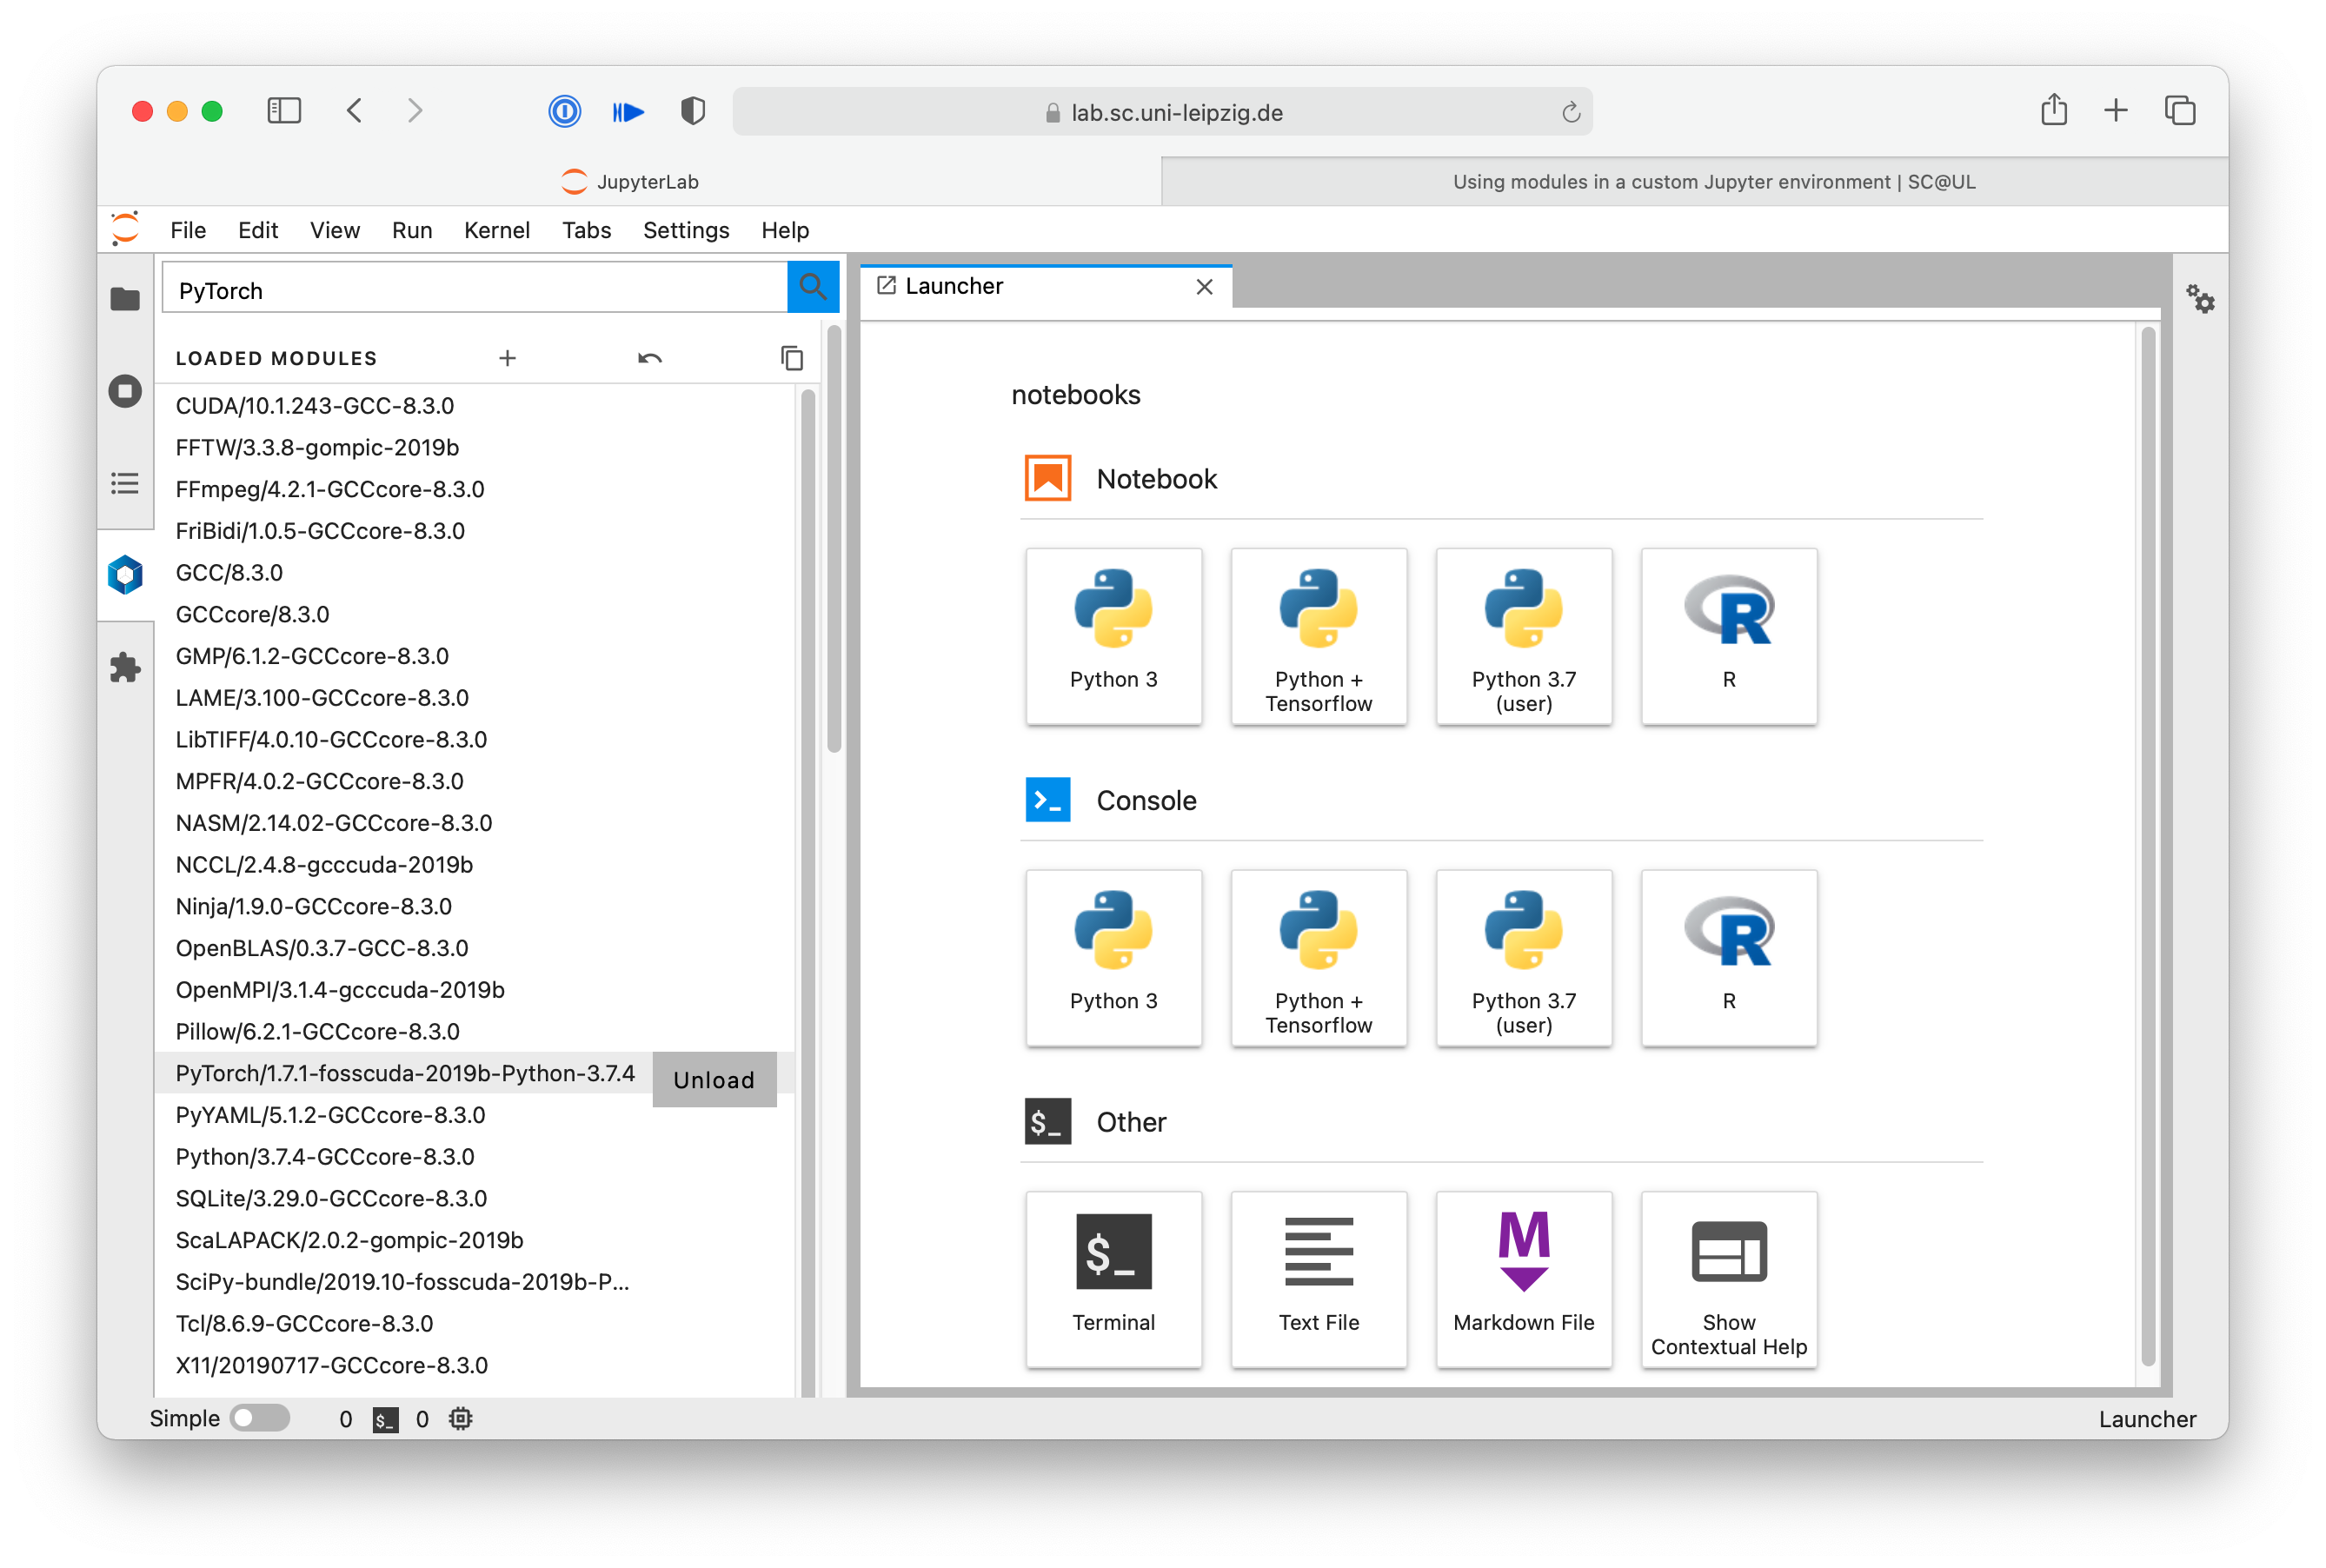
Then find the version you want to use with the appropriate Python version in the list of available modules and click load.
The modules and all needed dependencies are then loaded. They move up to the loaded modules section and are ready to be used in a new notebook.
Julia on lab.sc.uni-leipzig.de
- From the launcher, open a terminal and load the desired julia version
- you can press
TABfor autocompletion aftermodule load Julia/to see the available versions. $VERSIONis variable and refers to the version of Julia.- Now you can run Julia from the terminal
- In Julia, install IJulia in the base environment
- You should only have few packages installed in the base environment, e.g.
IJulia, debuggers, benchmark tools, etc. - Install packages for analyses in separate environments.
- Add a multithreaded kernel (change the number of threads to what you reserved)
- You can have several kernel with different numbers of threads installed at the same time.
- Wait 2 minutes.
- Now you can choose the kernel
Julia 4c $VERSIONfrom the launcher. - For your analysis create a specific environment and load this at the beginning of your notebook:
- Open a notebook with the Julia kernel and in the first cell execute
- Now you can use all packages installed in the environment
myanalysis.
NOTICE
Please read the documentation for Pkg.jl for details.
WebIO hinzufügen
Some packages, like WebIO, need an extension to Jupyter to work properly. How these kind of packages can be used, is explained here, using WebIO as an example.
Login via SSH to login01.sc.uni-leipzig.de or open a new "Terminal" in an already running JupyterLab session.
Check if pip from Anaconda is working.
(It should if you followed the instructions above).
Type which pip and check whether the output looks like this:
Now, you can just install the WebIO extension to Jupyter:
Very important is the --user parameter. This command installs the extension in your home directory.
The extension is available after you reload or after your next login to Jupyter.
Now, you can install and use WebIO in Julia notebooks in Jupyter:
Intalling the package via Pkg.add("WebIO") is only needed once, of course.