Compute clusters via SSH
Connecting to SC clusters
To use our HPC clusters via Slurm, you can login to one of our three dedicated login nodes.
- login01.sc.uni-leipzig.de
- login02.sc.uni-leipzig.de
Our login nodes serve as the gateway to the HPC system, allowing users to access the computing resources. Their main purposes are authentication and authorization, file management, resource allocation, job submission and monitoring.
All partitions are available from both login nodes.
login01 shares the same hardware with the clara partition, i.e. it has one Tesla V100 and one GeForce RTX 2080Ti installed.
You can use these GPUs to test if your application works with CUDA and the GPUs in the clara partition.
login02 shares the same hardware with the paula partition, i.e. it has two Tesla A30 GPUs equipped.
Please note
Accessing this service requires you to be within the university's internal network or connect via VPN.
You will need to login with your SC account, which is different from your Uni account.
To connect to the clusters, simply open a Terminal on your local workstation and type
after tyiping in your password, you will be greated with a welcome screen, like this one. This is also where we will announce any maintenance or other news related to this service.
You will also see your current disk usage and quota for your home and work directories.
Welcome to

   _____           ______
  / ___/          / ____/
  \__ \          / /
 ___/ /         / /___
/____/cientific \____/omputing

Documentation for this system can be found at https://www.sc.uni-leipzig.de/

Please submit service requests to sc-request@uni-leipzig.de
Last login: Tue Apr 16 07:57:54 2024 from xxx.xxx.xxx.xxx
Home Quota: 87.5K used of 200G
Work Quota: 697k used of 1T
Warning
Do not run jobs on the login nodes!
Do not run remote editors on the login nodes!
It is much more convenient to use SSH keys to login to our cluster.
SSH keys
What are SSH keys
You can use SSH to securely connect to our systems. When you are using an SSH key you can even login without using a password. An SSH key is actually a pair of keys; a public key and a private key. The private key stays with you and you can (and should) protect it with a password. The public key is uploaded to the system you want to log in to. Now you can use your key pair to log in without having to type your password every time.
Generating an SSH key
There are several algorithms to generate SSH key pairs, we recommend using ED25519, which is considered the most secure to date.
You can find additional information on that here and here.
In the following, we will demonstrate how to generate SSH keys on Windows, macOS, and Linux.
Windows
You have several options to create an SSH key on Windows.
Here, we will show two of them.
First, the most straight-forward method, using the Windows command prompt and, as a second option, we present PuTTYgen.
Command prompt
Starting with Windows 10 (1809) OpenSSH is already installed by default, so make sure you are up to date.
Click the Start menu and open the Command prompt.
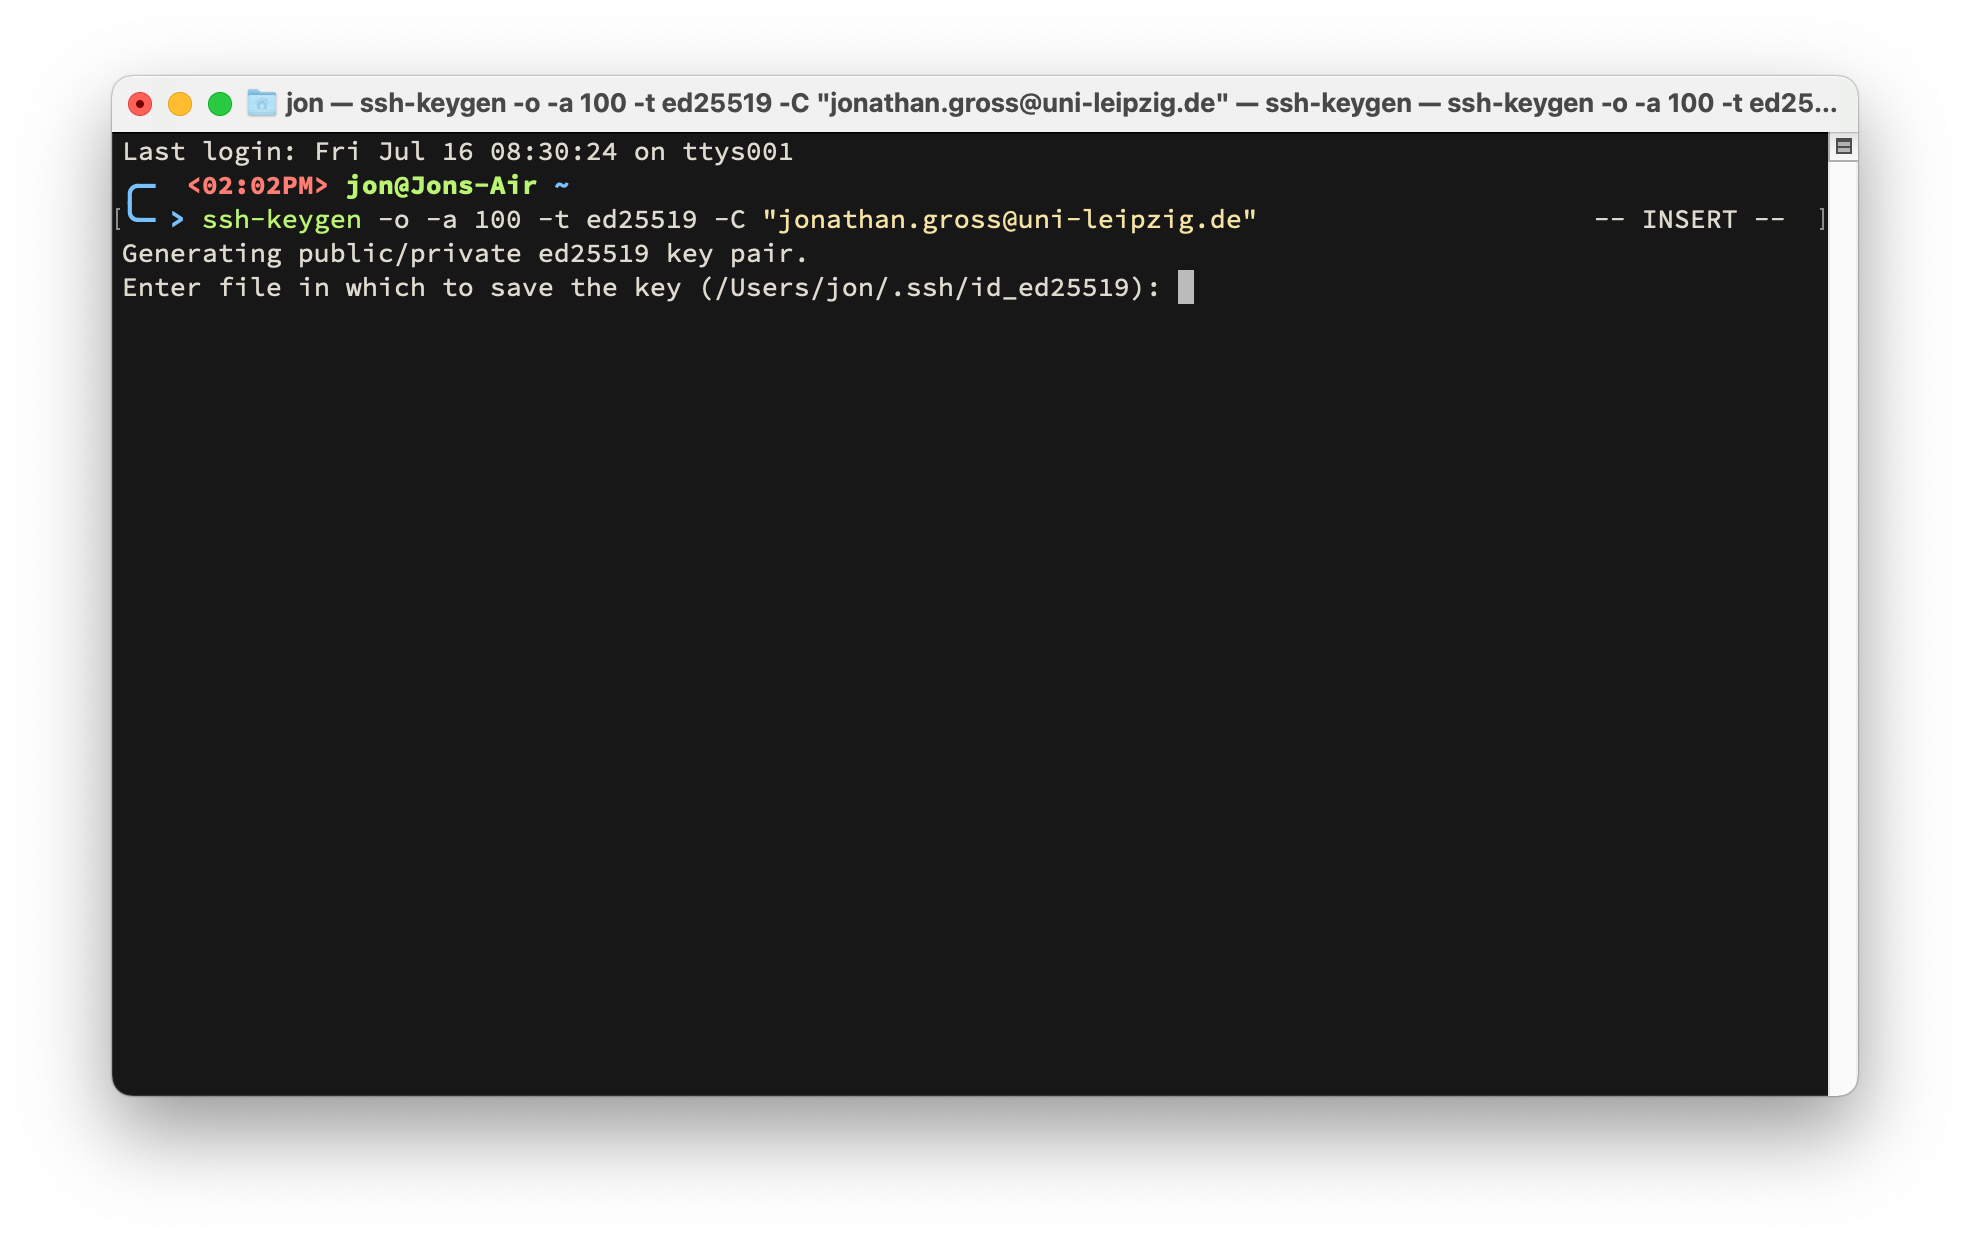
On the command prompt enter the following:
The options we use here are the following:
-o save private key in the newer OpenSSH format
-a 100 is the number of "key derivation function" rounds used to generate the private key.
This increases the resintance to brute-force attacks on your private key password.
-t ed25519 use the ED25519 algorithm to generate your key.
-C "[your comment here]" is used to give your key a name to identify it by.
You can use your email address for example.
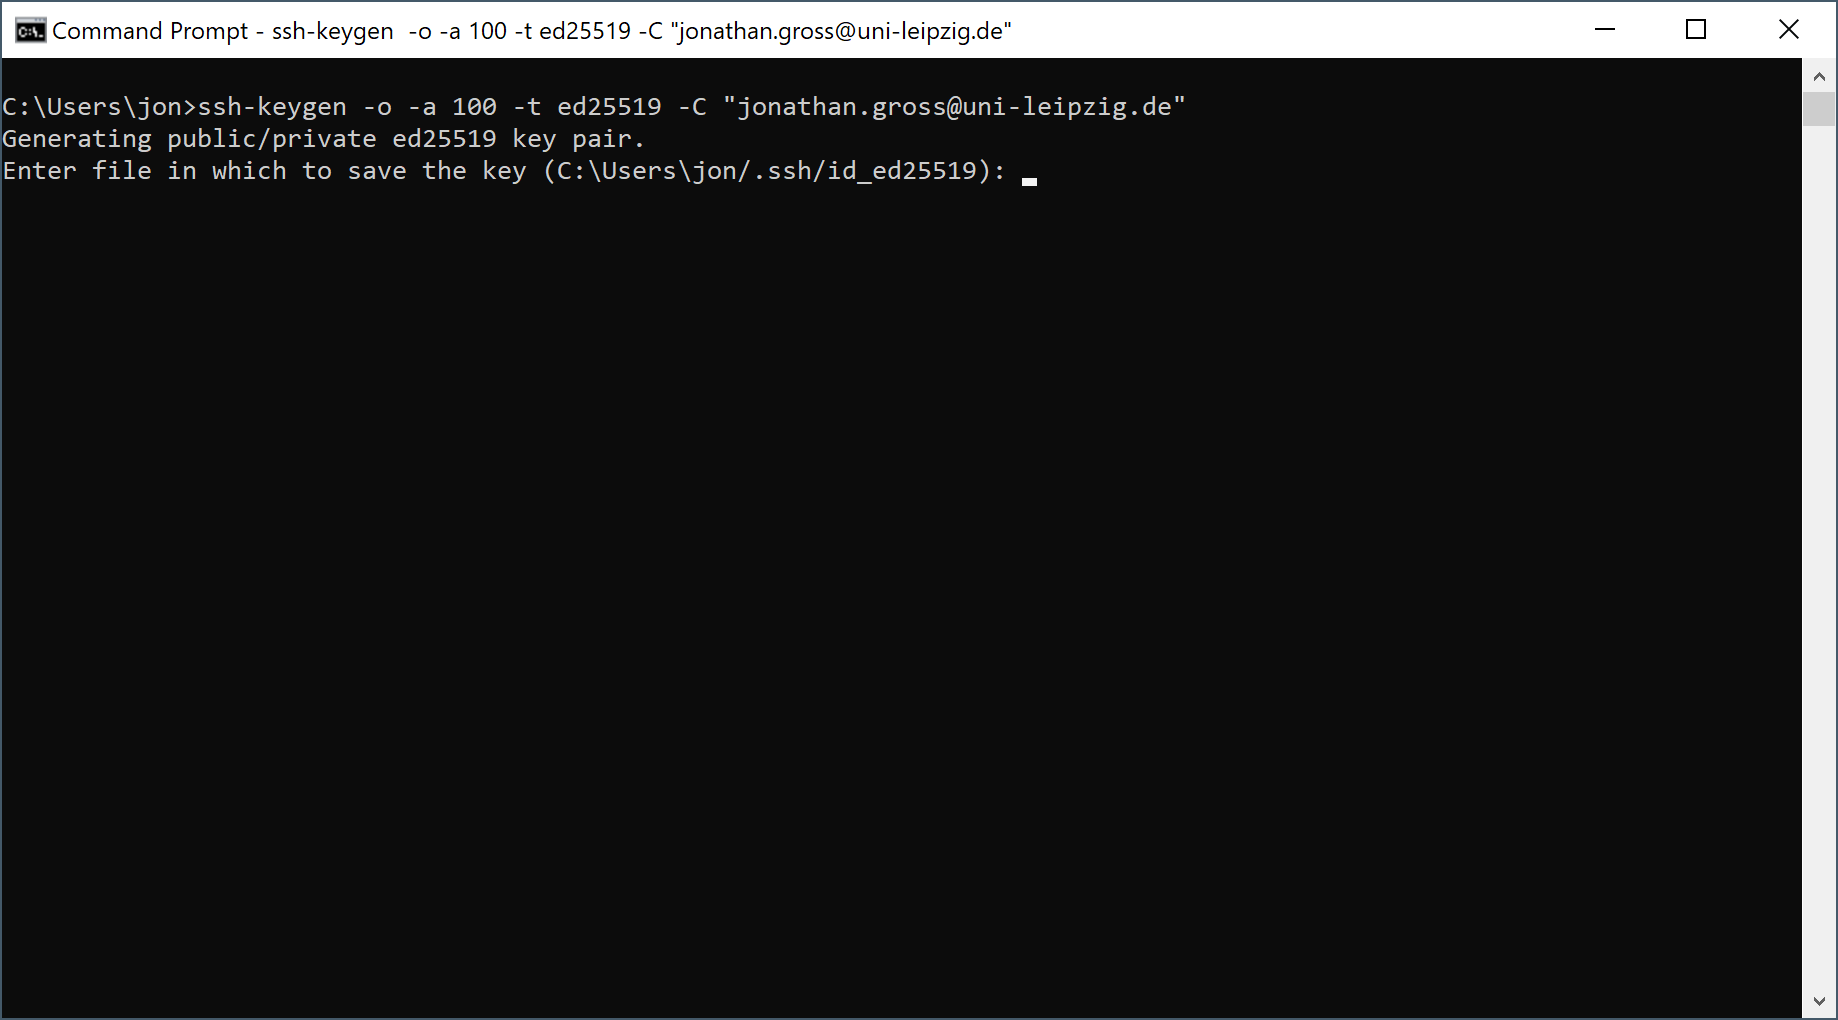 Press the
 Return key to accept the default location for your key files or enter a custom path and filename.
We recommend keeping the default location and filename.
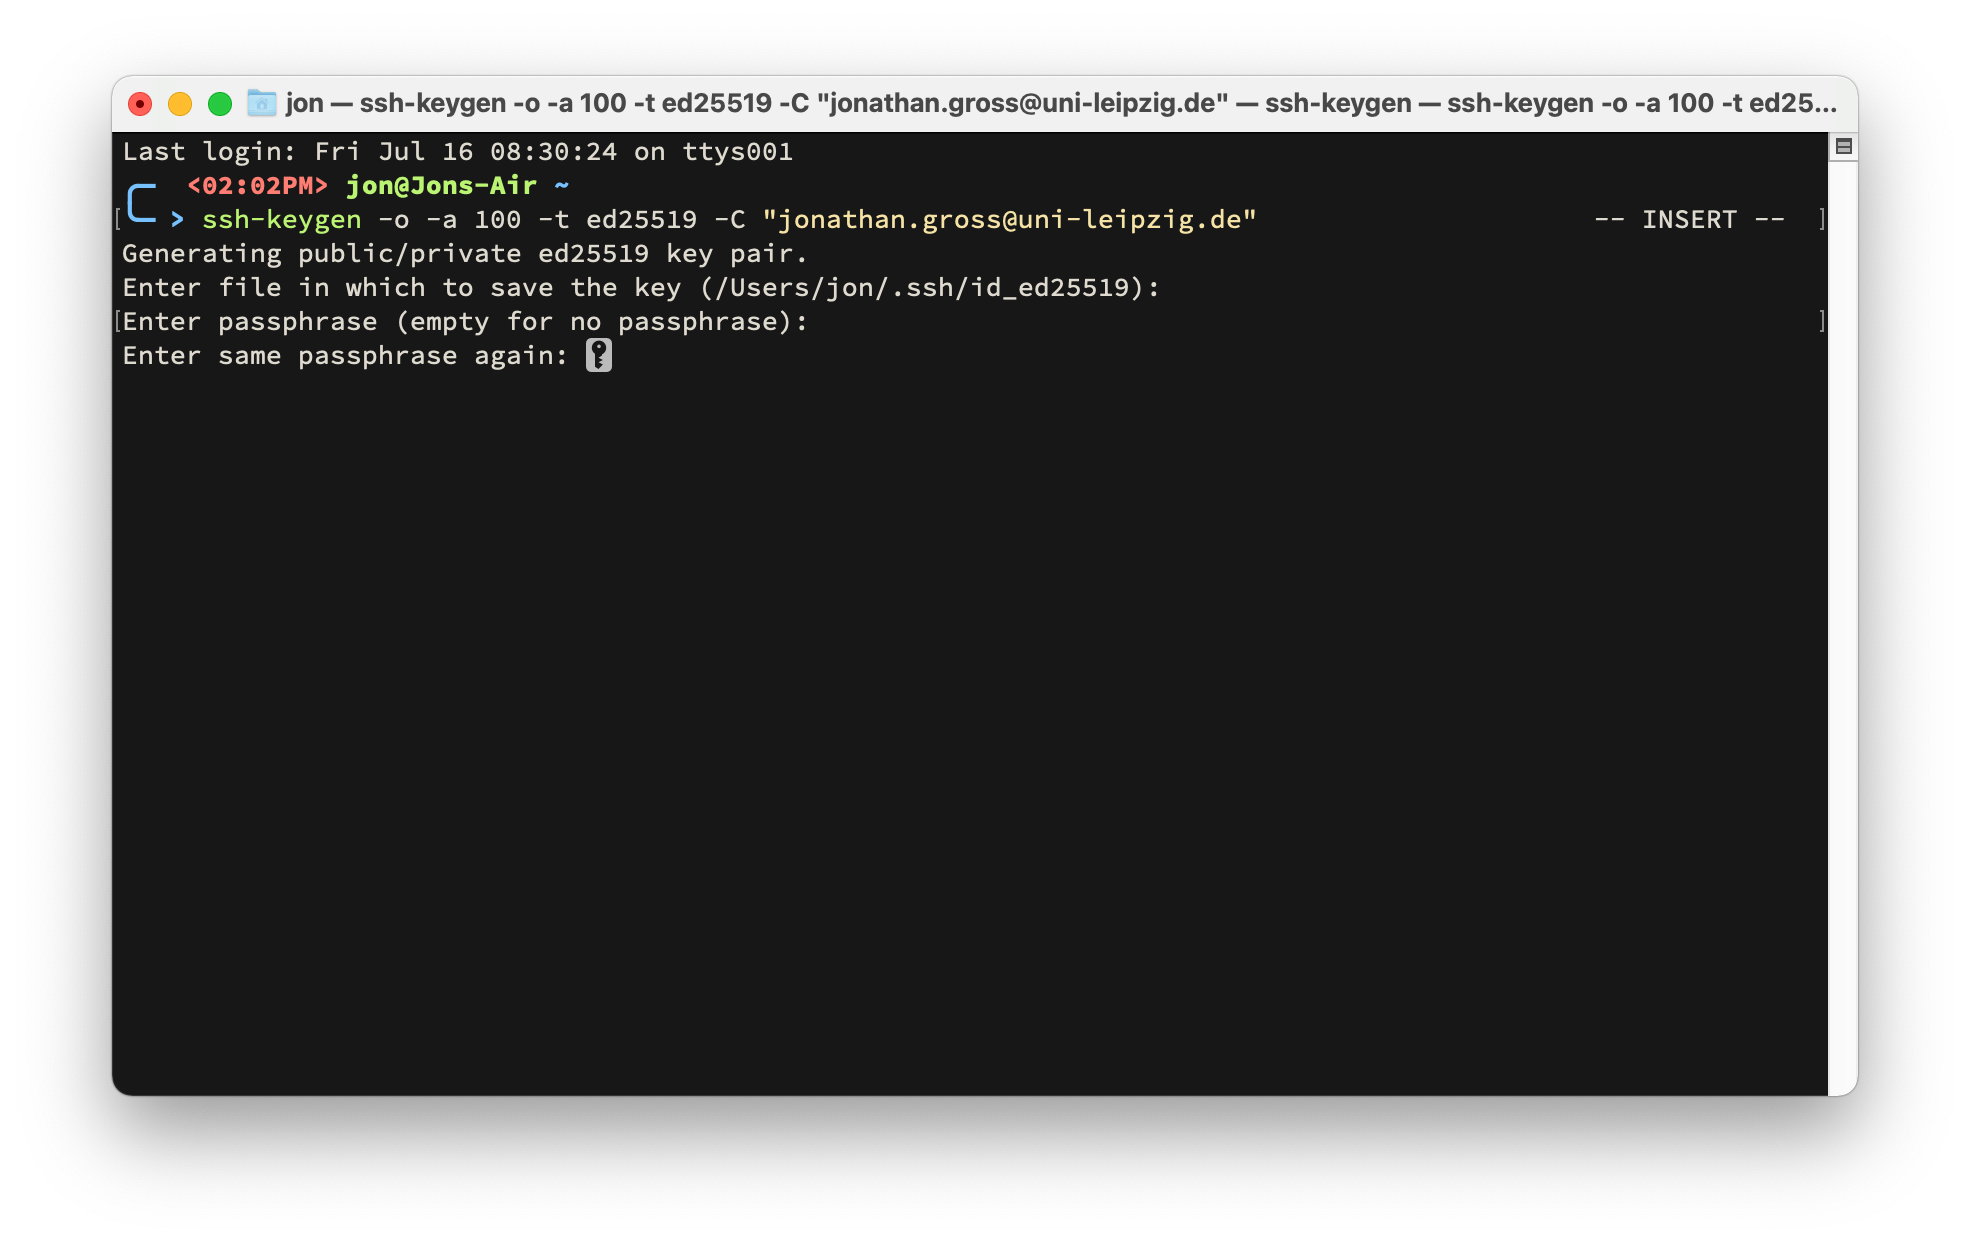
In the next step, give your private key a secure passphrase.
You need to enter the same secure passphrase twice to protect your private key.
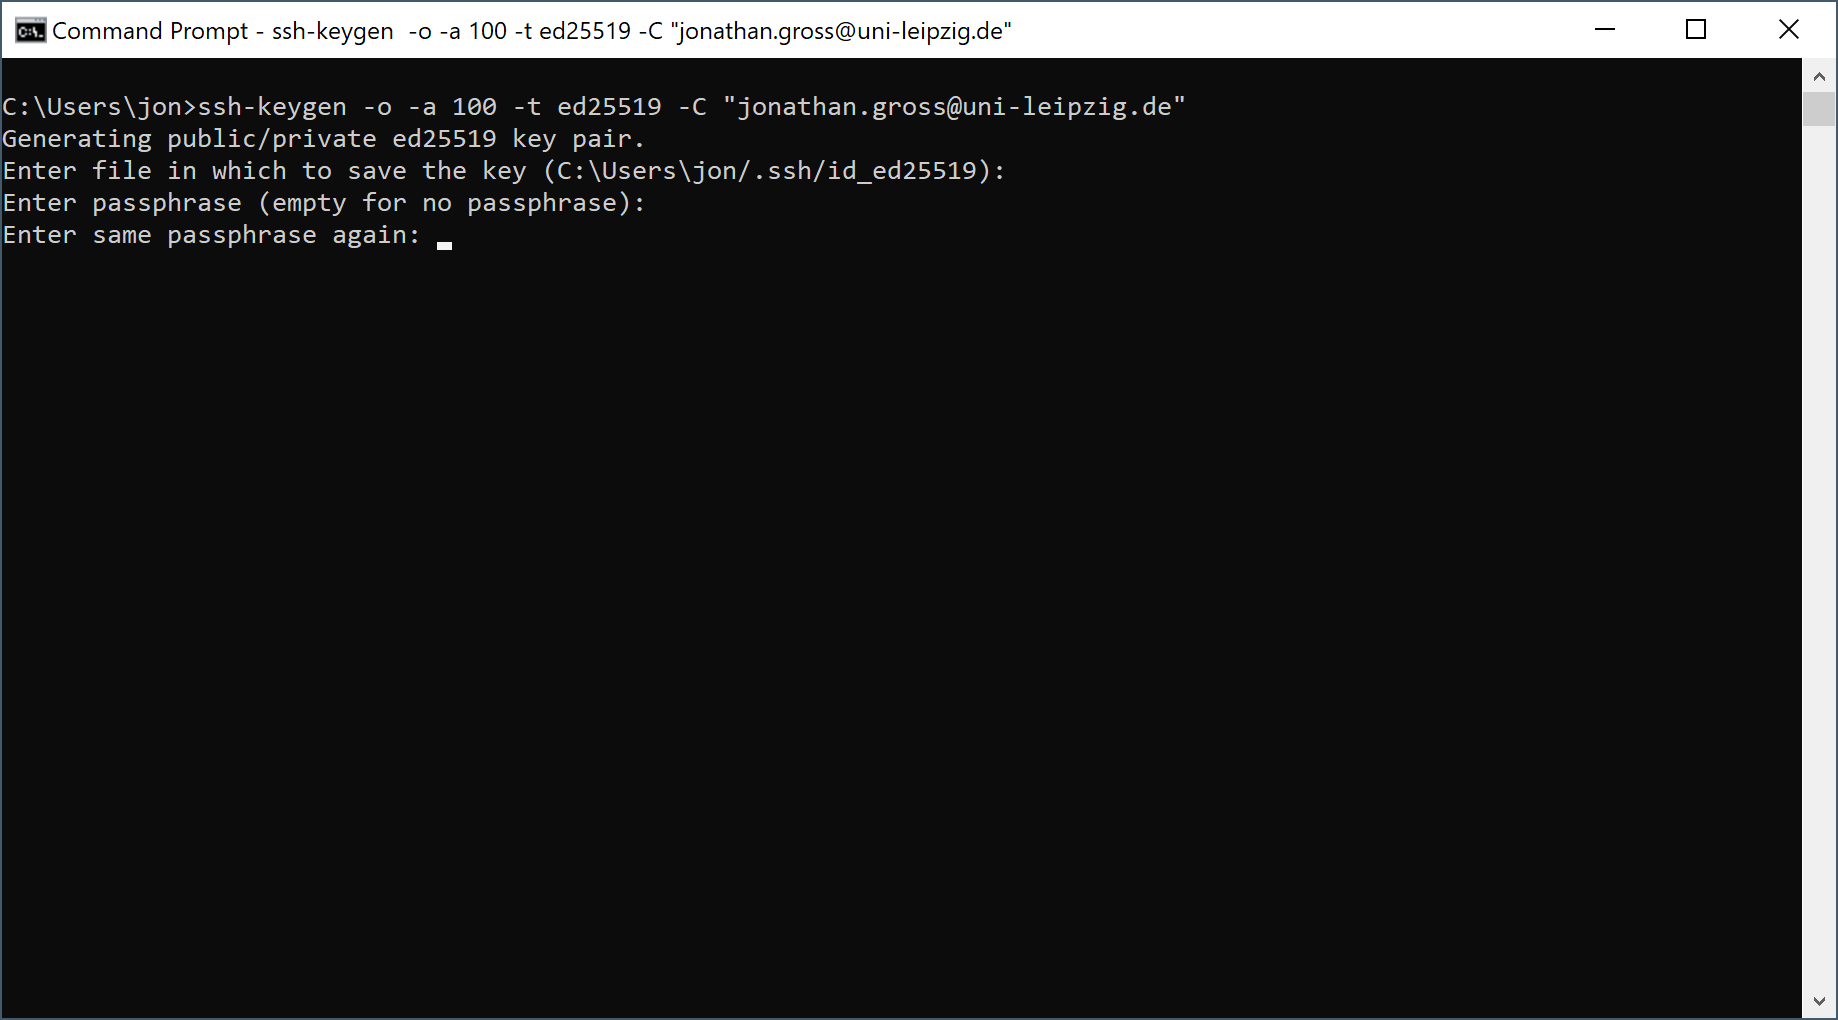
Warning
Pick a new passphrase! Do not reuse any passwords!
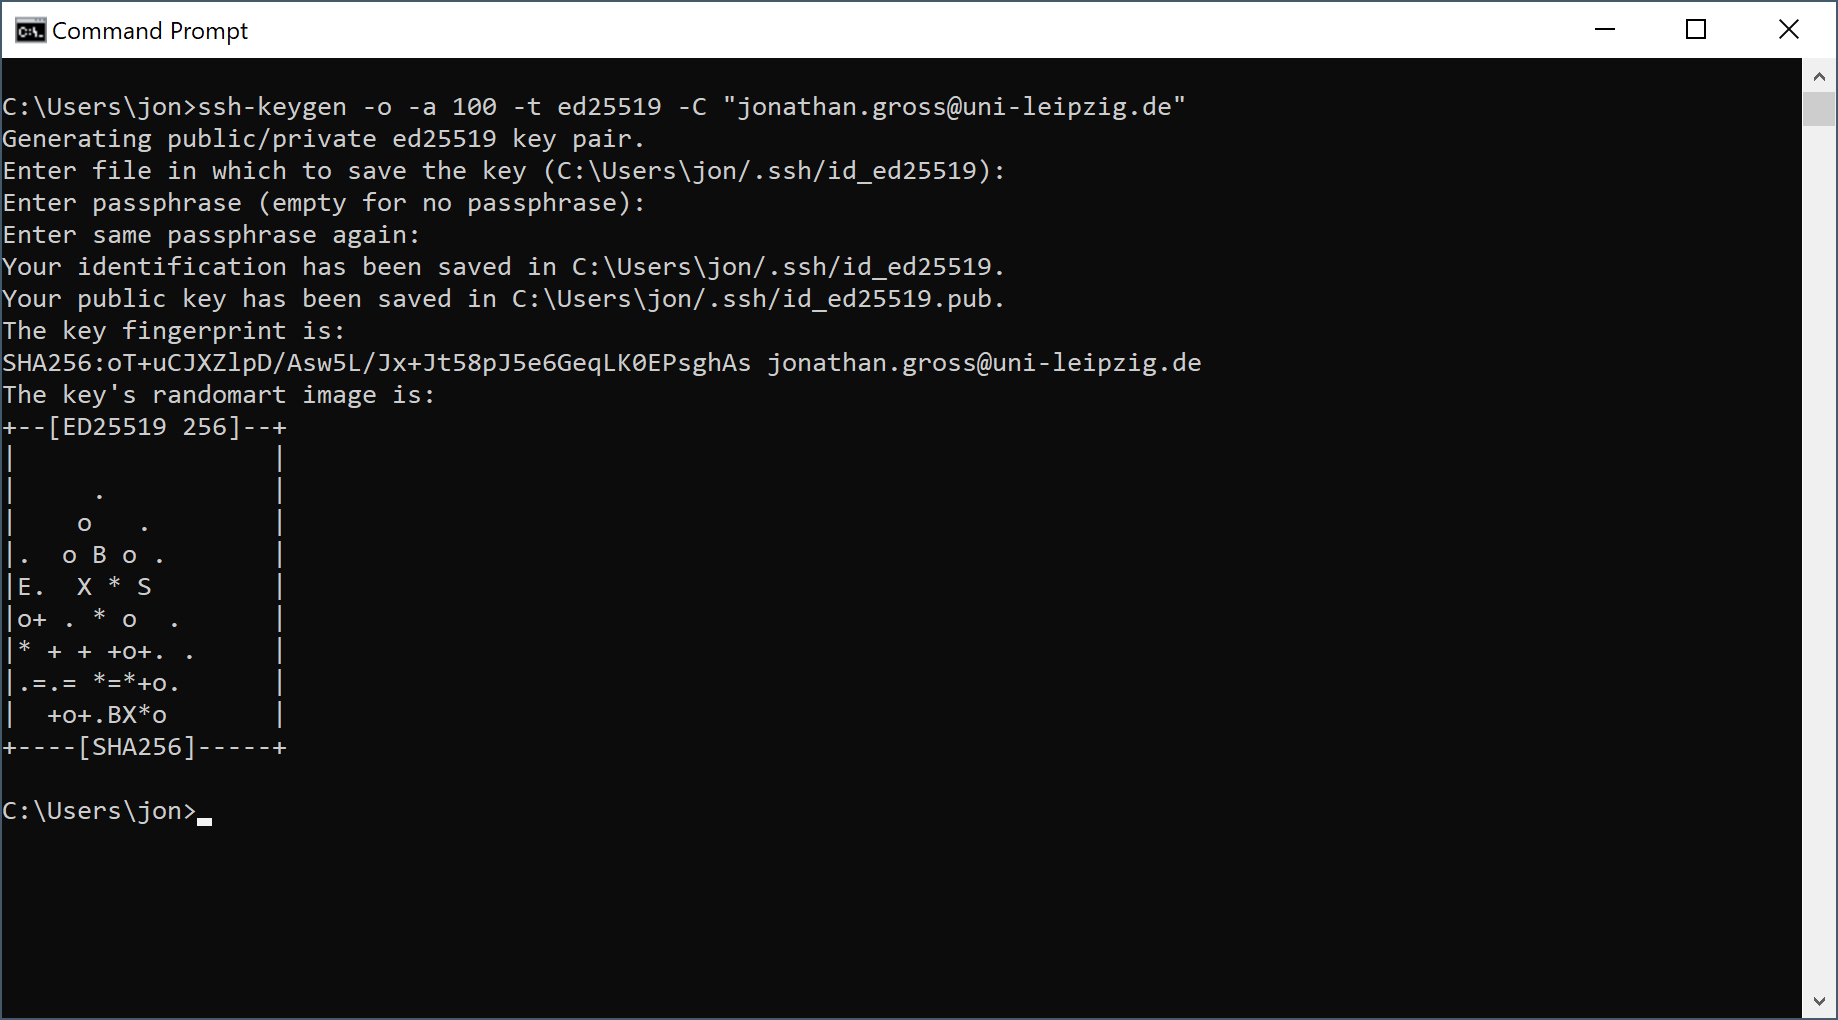 After you entered the same passphrase twice, your key pair will be generated for you.
Remember the location and filename of your public key. You will need to upload this file to the cluster, later.
If you kept the standard location, you can find your public key in %userprofile%\.ssh\id_ed25519.pub.
PuTTYgen
Alternatively, you can use PuTTYgen to generate your key pair. You may be using PuTTY as your SSH client anyways already.
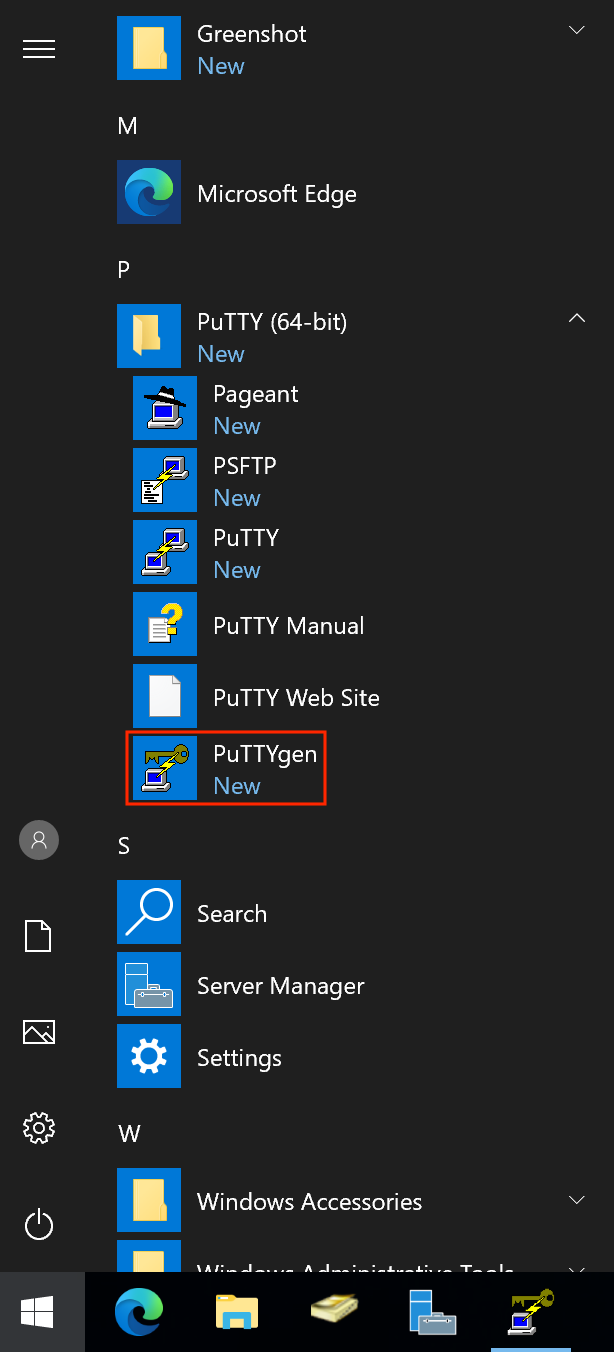
In the PuTTYgen window first select EdDSA as the type for your key then click Generate.
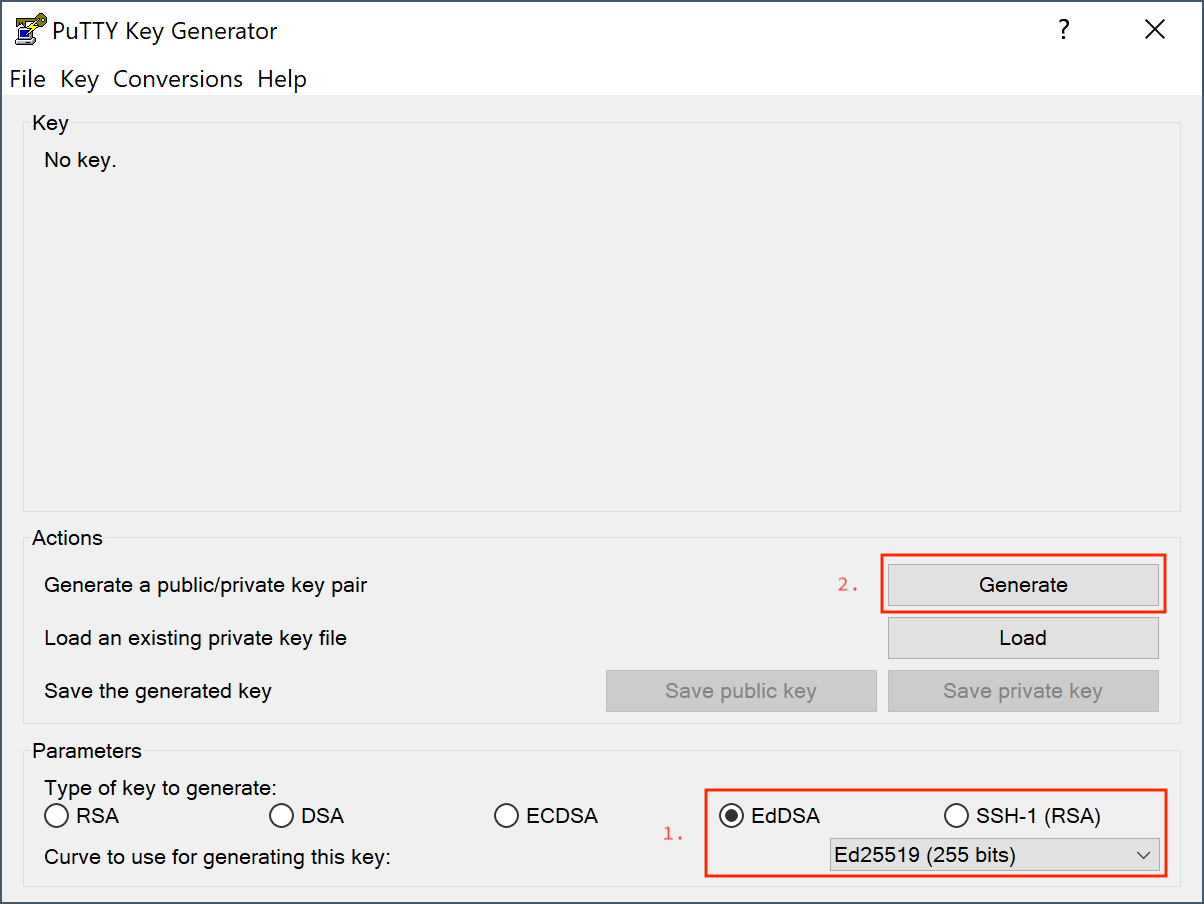
During the generation of your key, you need to provide randomness to the process by moving the mouse in a designated area.

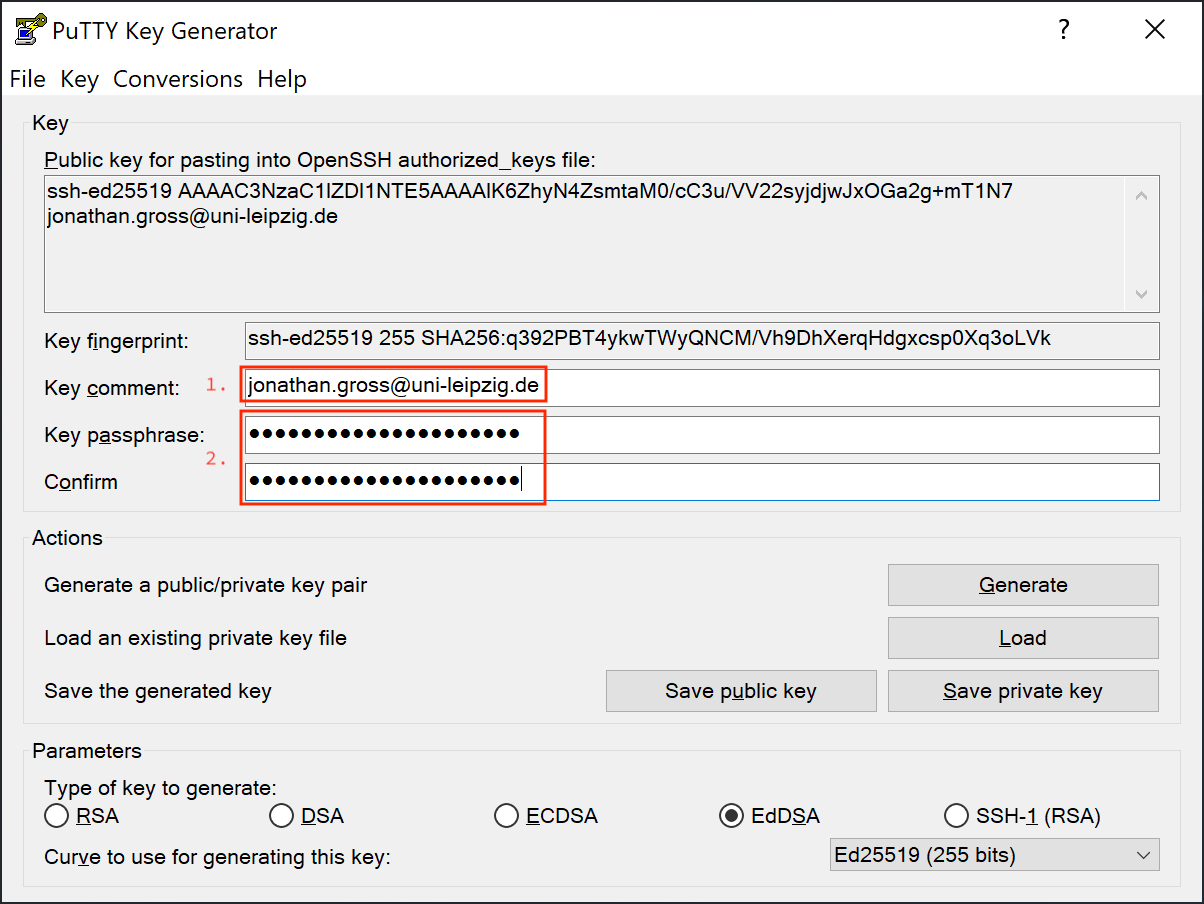
After your key pair is generated, you may enter a comment to give your key a name to identify it by.
You can use your email address for example.
Also you need to set a password to protect your private key.
Enter the same passphrase twice in the designated spots.
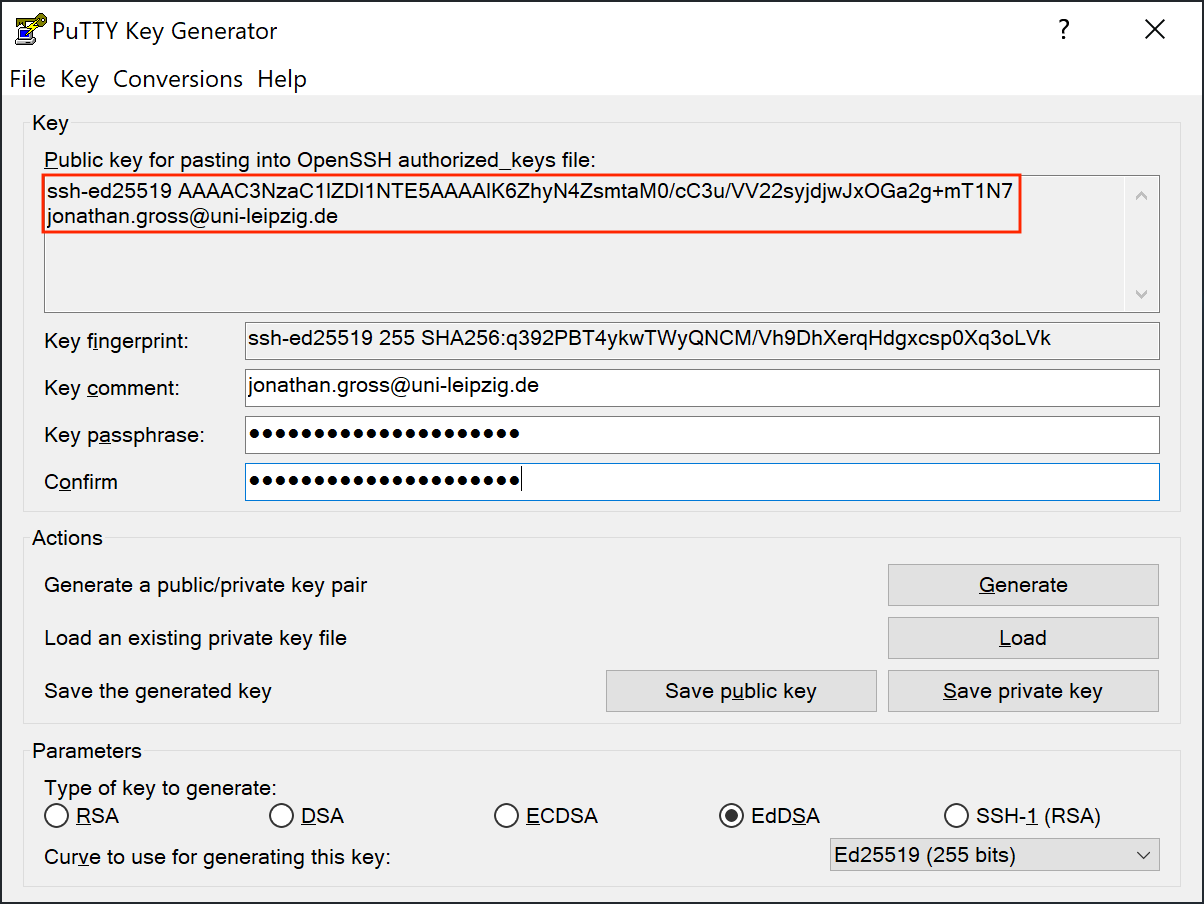
Now you need to save your public key to a text file.
You will need to upload this file to your SC account later.
The default location would be %userprofle%\.ssh\id_ed25519.pub.
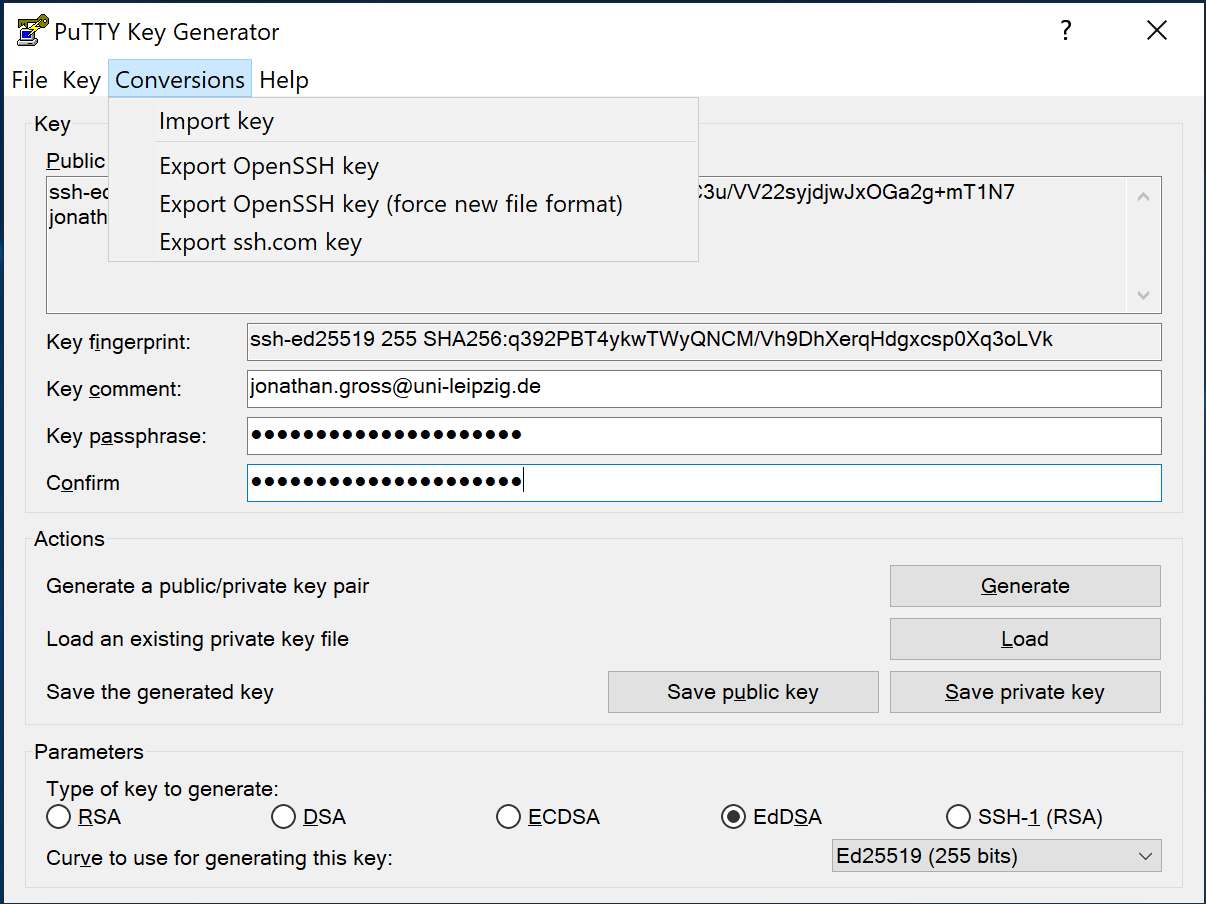
Last but not least, do not forget to save your private key, as well.
For that click Conversions\Export OpenSSH key in the menu in PuTTYgen and save your private key.
Again, a good and also the default location would be %userprofile%\.ssh\id_ed25519.
macOS
Open the Terminal.app or your favorite terminal emulator and enter the following commands.
The options we use here are the following:
-o save private key in the newer OpenSSH format
-a 100 is the number of "key derivation function" rounds used to generate the private key.
This increases the resintance to brute-force attacks on your private key password.
-t ed25519 use the ED25519 algorithm to generate your key.
-C "[your comment here]" is used to give your key a name to identify it by.
You can use your email address for example.
Press the Return key to accept the default location for your key files or enter a custom path and filename.
We recommend keeping the default location and filename.
In the next step, give your private key a secure passphrase.
You need to enter the same secure passphrase twice to protect your private key.
Warning
Pick a new passphrase! Do not reuse any passwords!
 After you entered the same passphrase twice, your key pair will be generated for you.
Remember the location and filename of your public key. You will need to upload this file to the cluster, later.
To add your private key to your macOS keychain enter the following command:
Use the path and filename you provided in the first step.
Your private key will now automatically be available when you login to macOS.
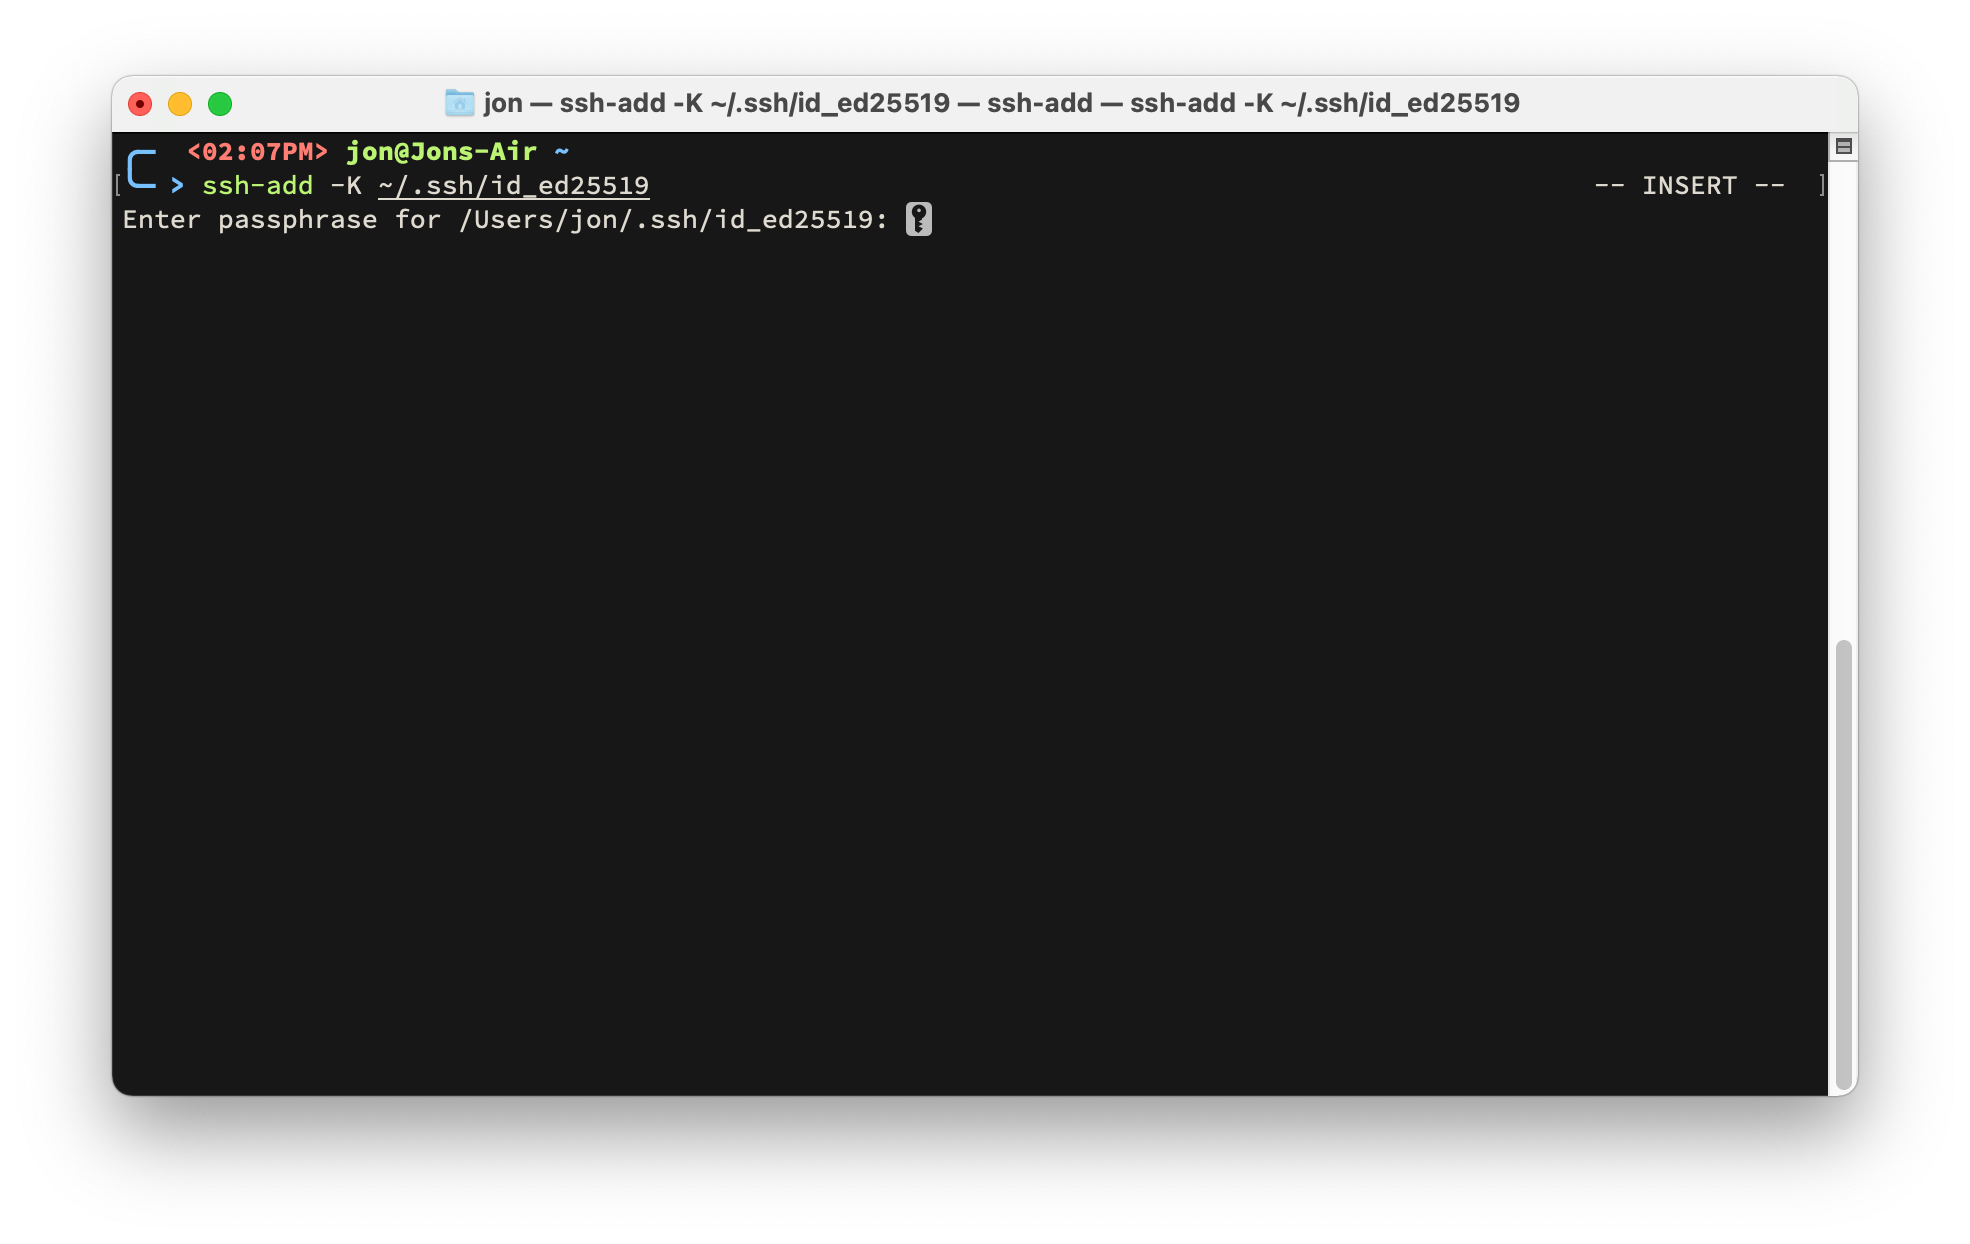 Just enter your password one last time and enjoy secure passwordless SSHing.
Linux
Open your favorite terminal emulator and enter the following commands.
The options we use here are the following:
-o save private key in the newer OpenSSH format
-a 100 is the number of "key derivation function" rounds used to generate the private key.
This increases the resintance to brute-force attacks on your private key password.
-t ed25519 use the ED25519 algorithm to generate your key.
-C "[your comment here]" is used to give your key a name to identify it by.
You can use your email address for example.
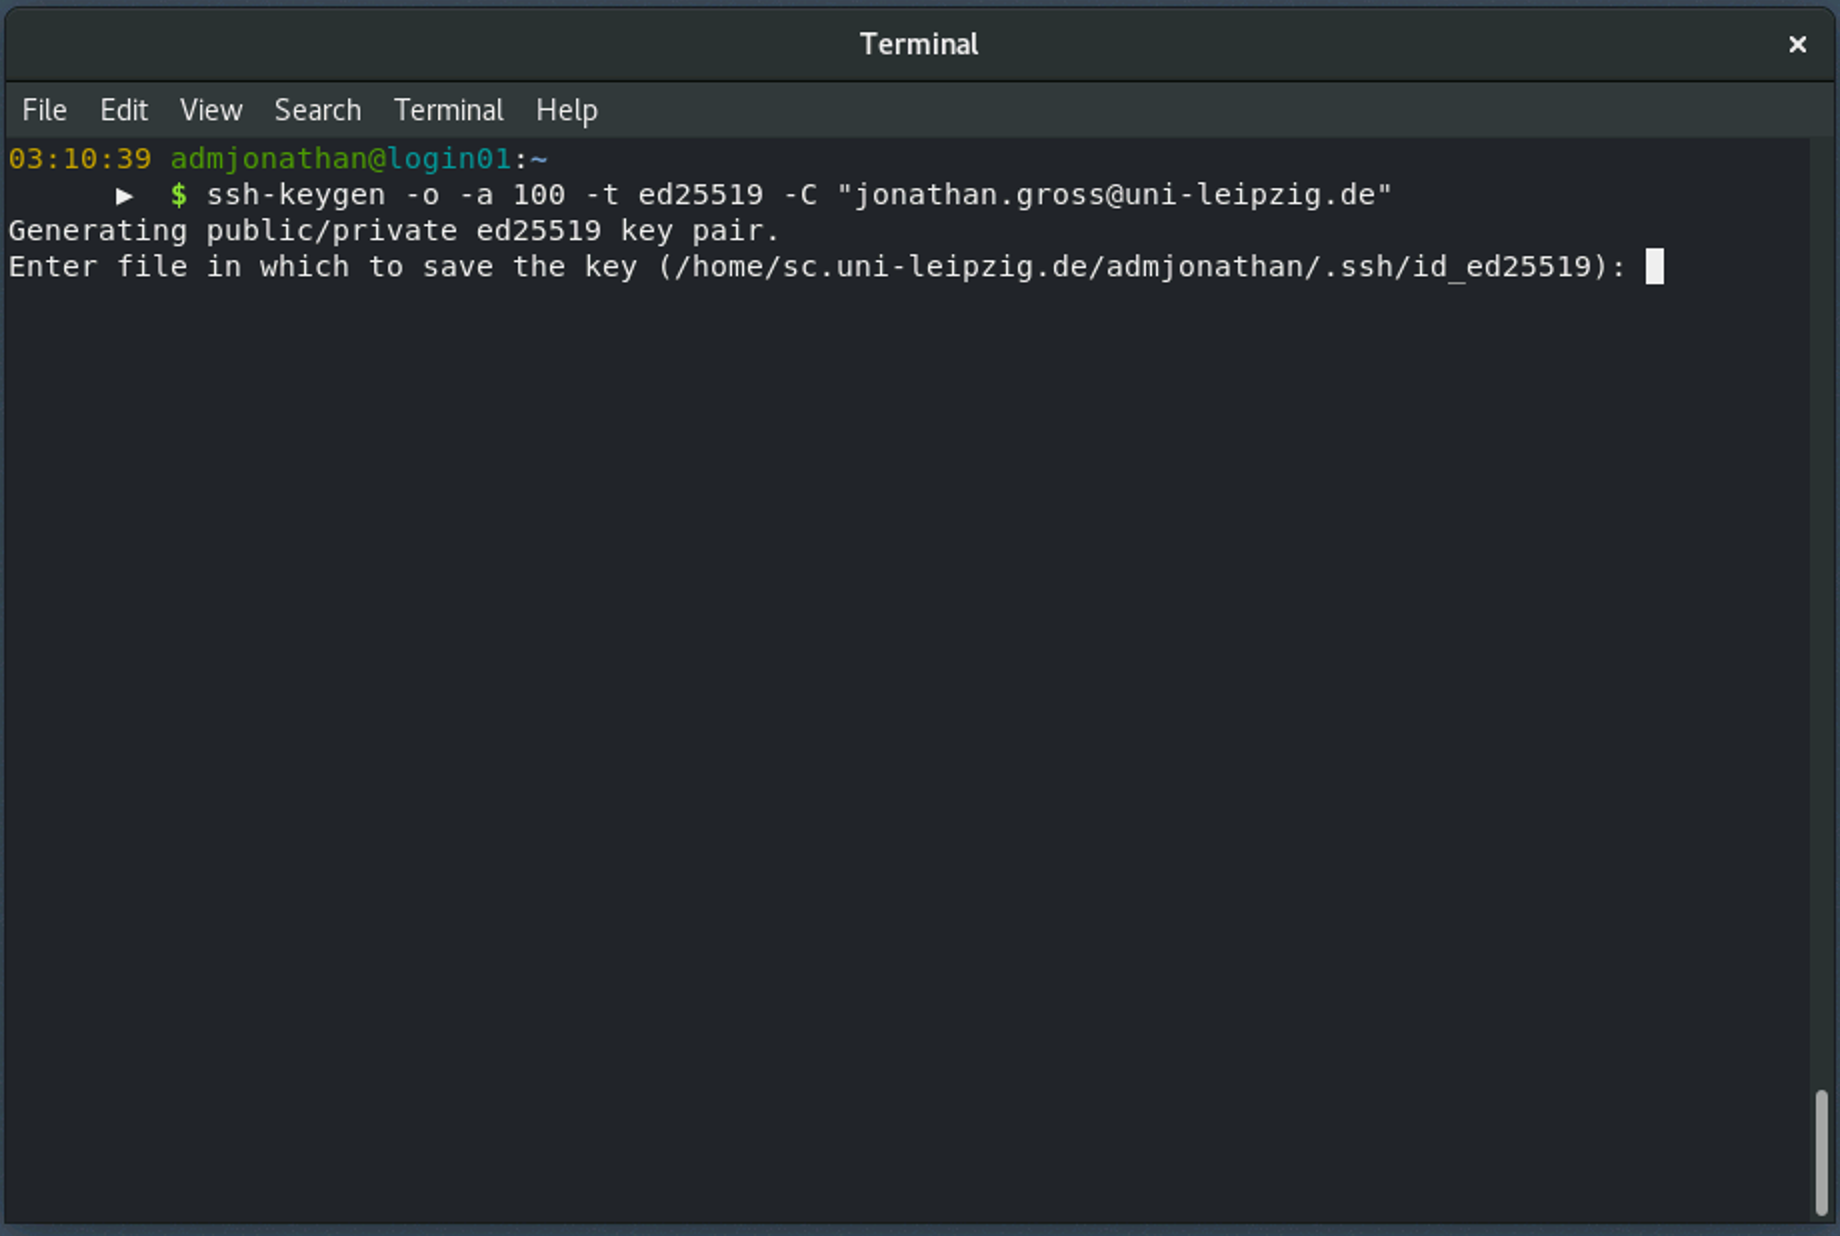 Press the
 Return key to accept the default location for your key files or enter a custom path and filename.
We recommend keeping the default location and filename.
In the next step, give your private key a secure passphrase.
You need to enter the same secure passphrase twice to protect your private key.
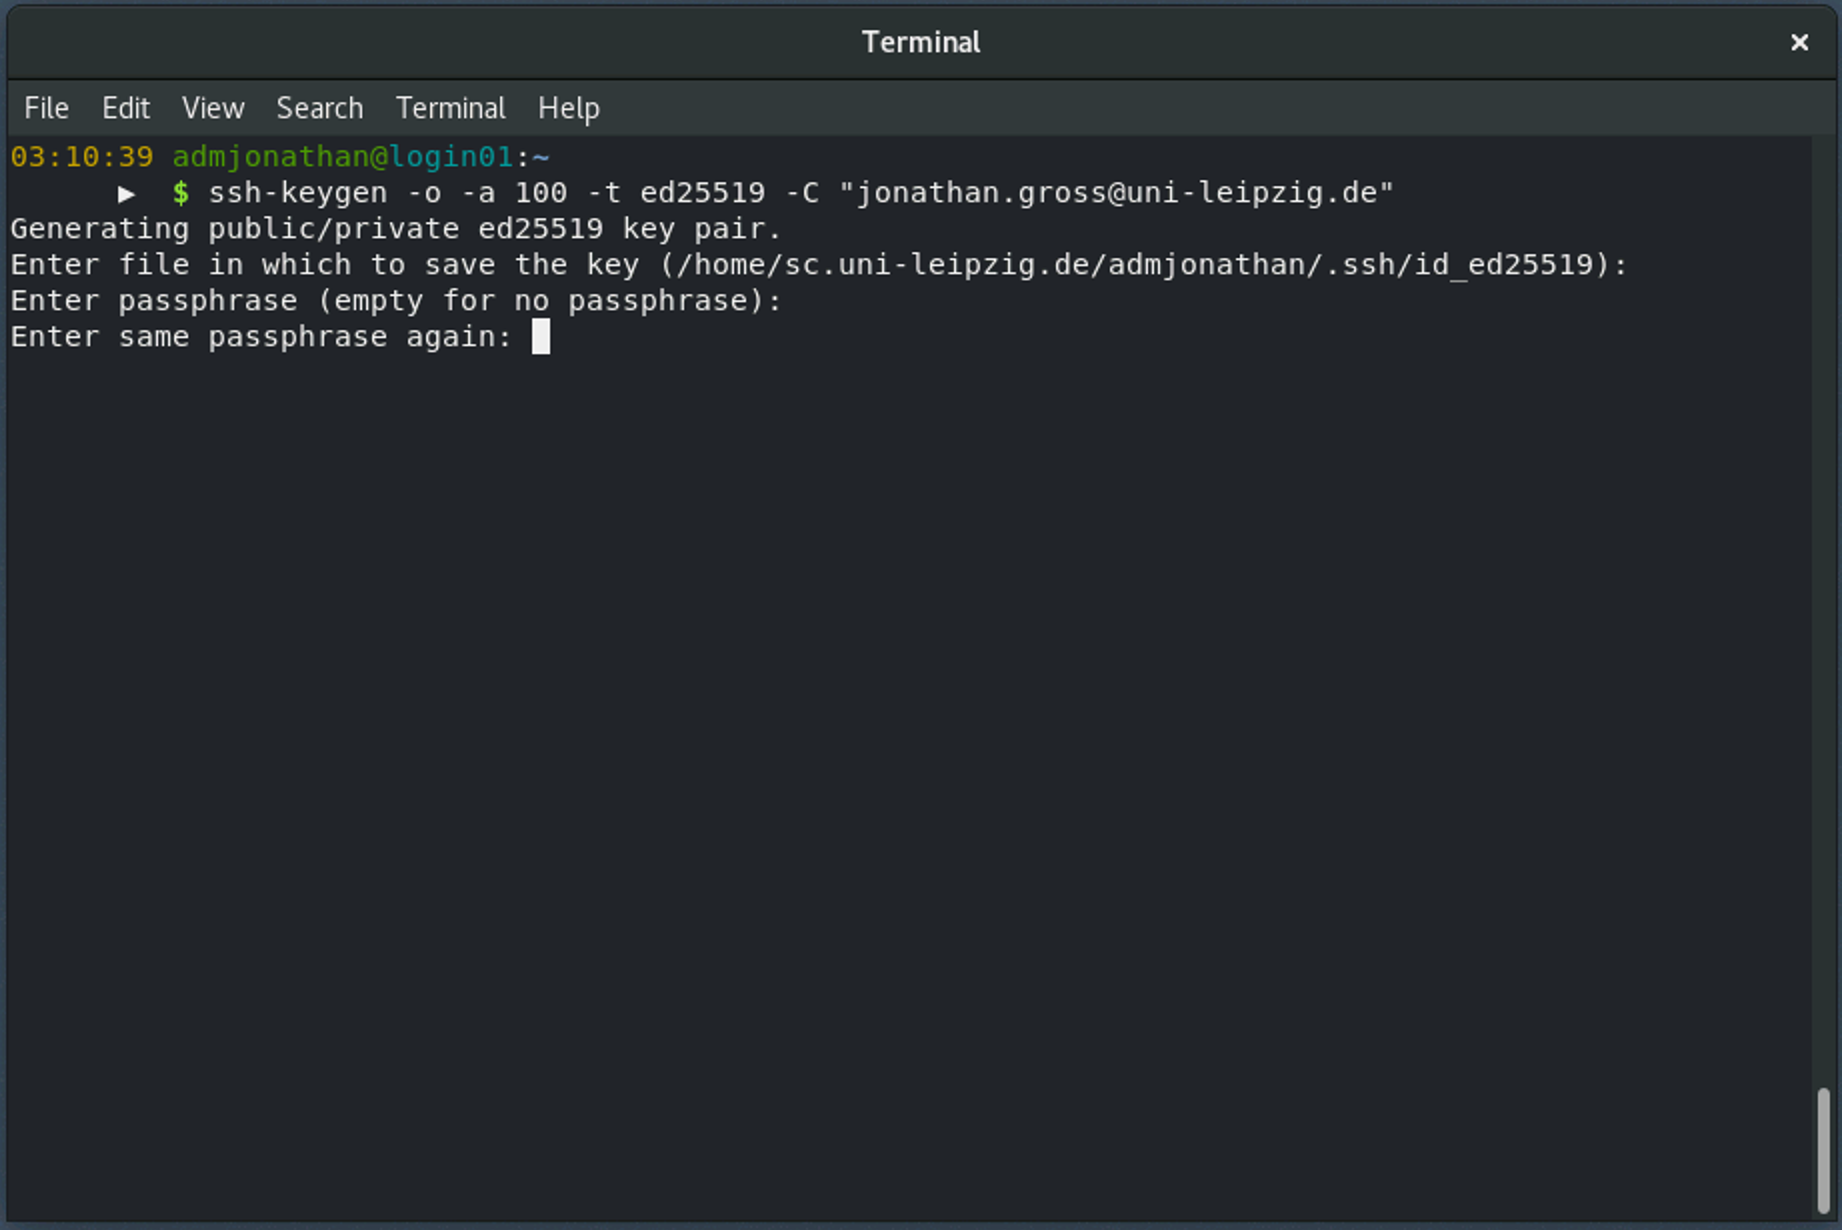
Warning
Pick a new passphrase! Do not reuse any passwords!
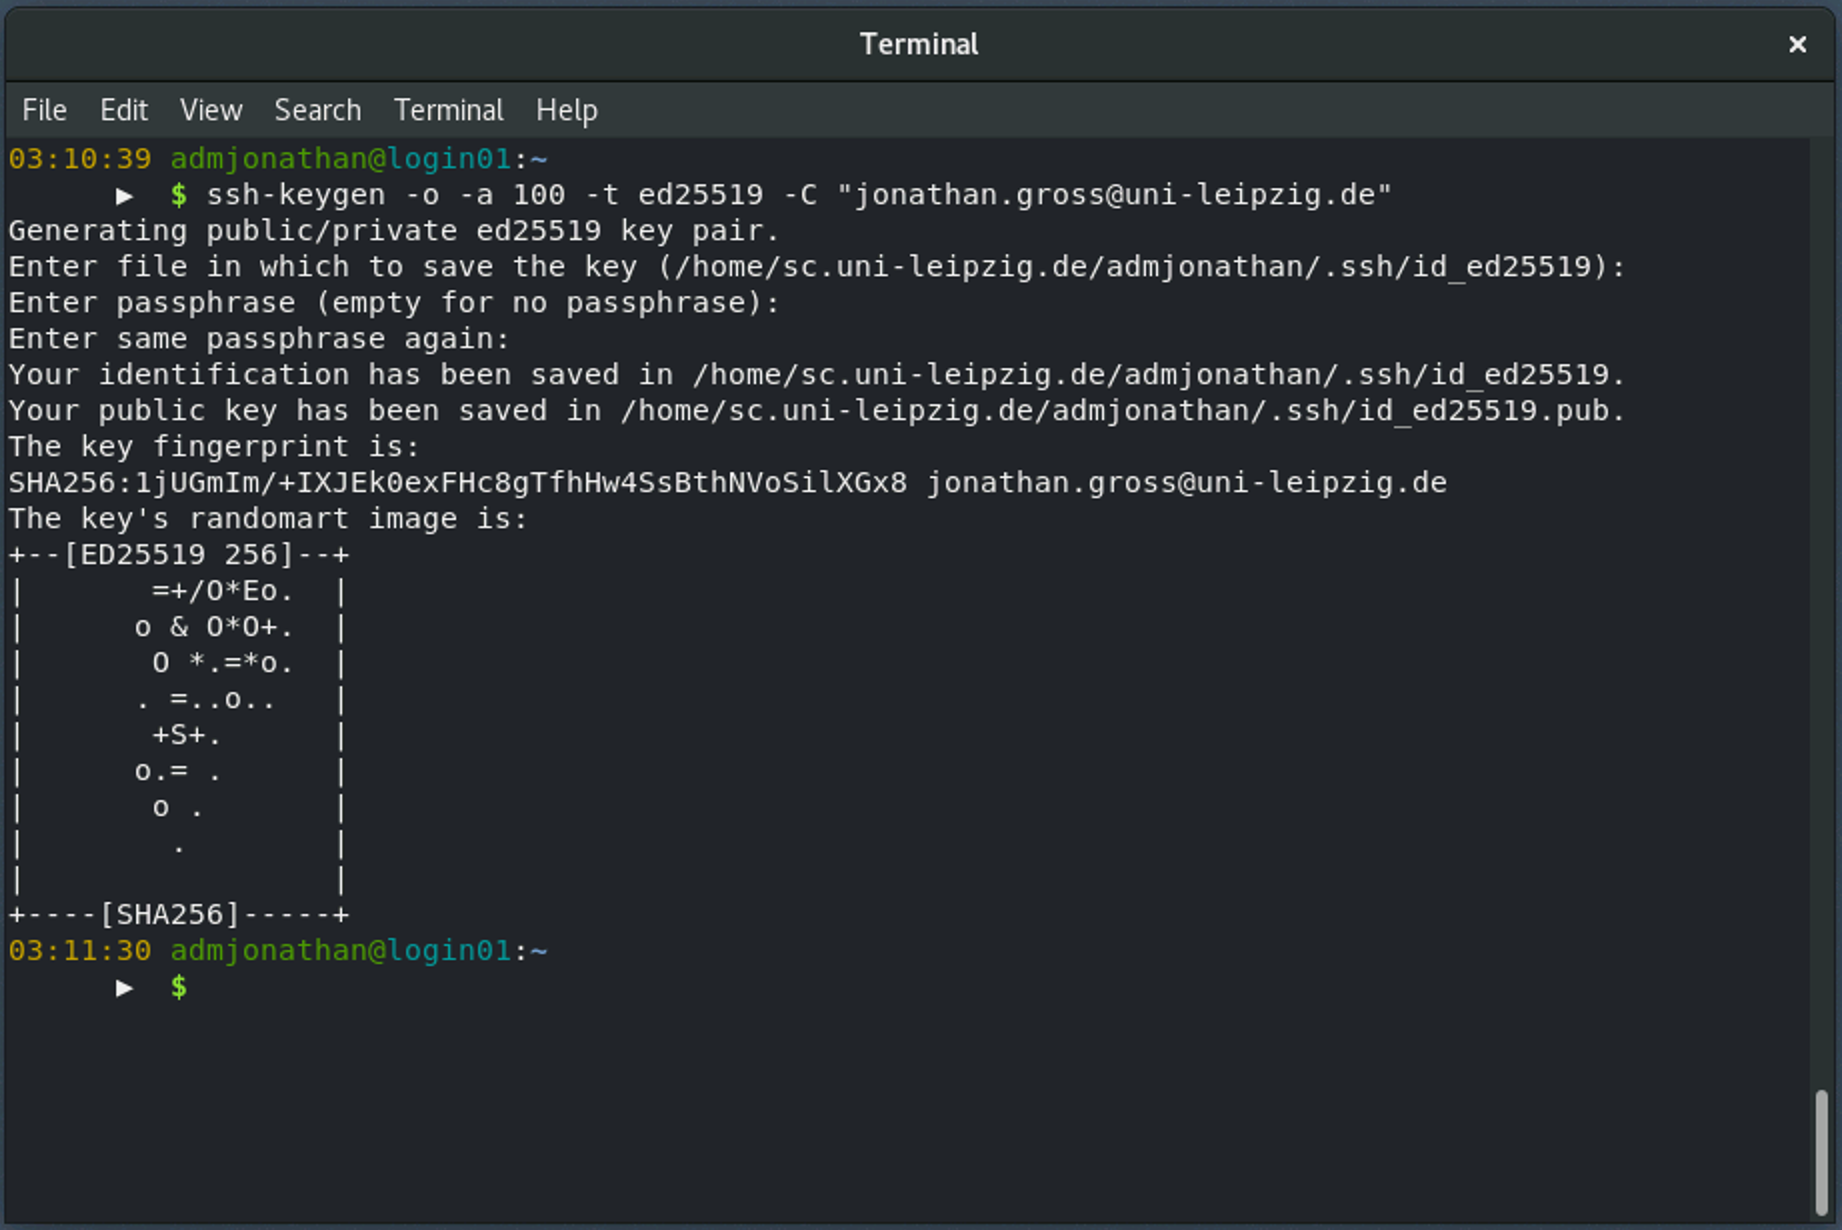
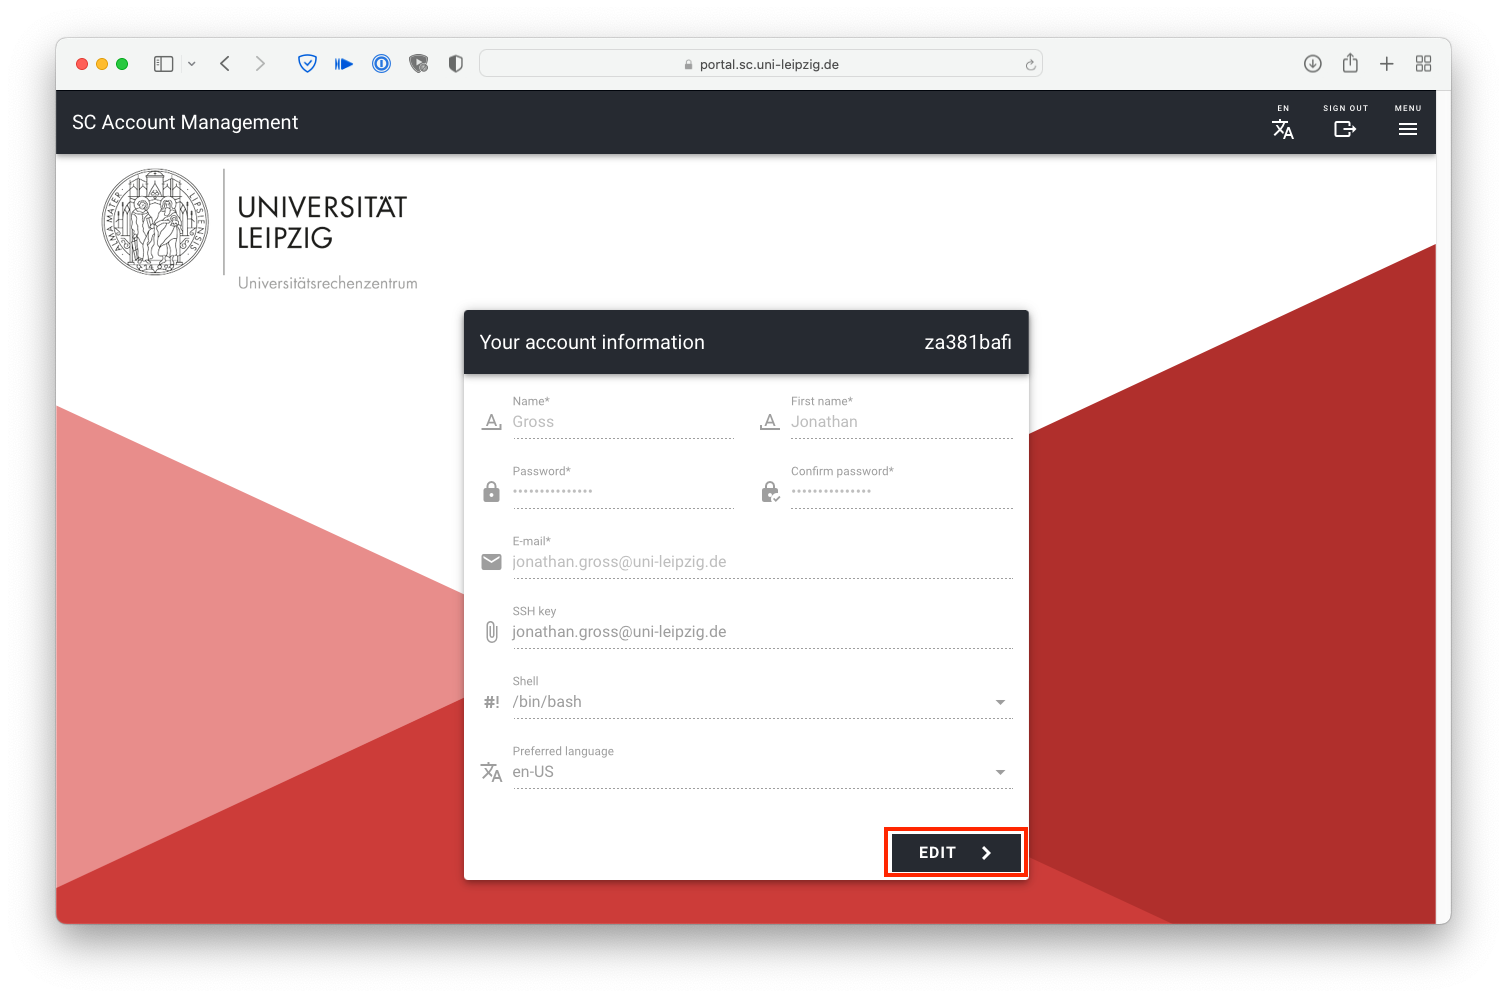
Add SSH key to your SC account
To use your public key to login to our clusters, you can upload it via our account management system.
Login with your SC credentials and click EDIT.
Click the paper clip icon to select the file with your public key you want to upload.
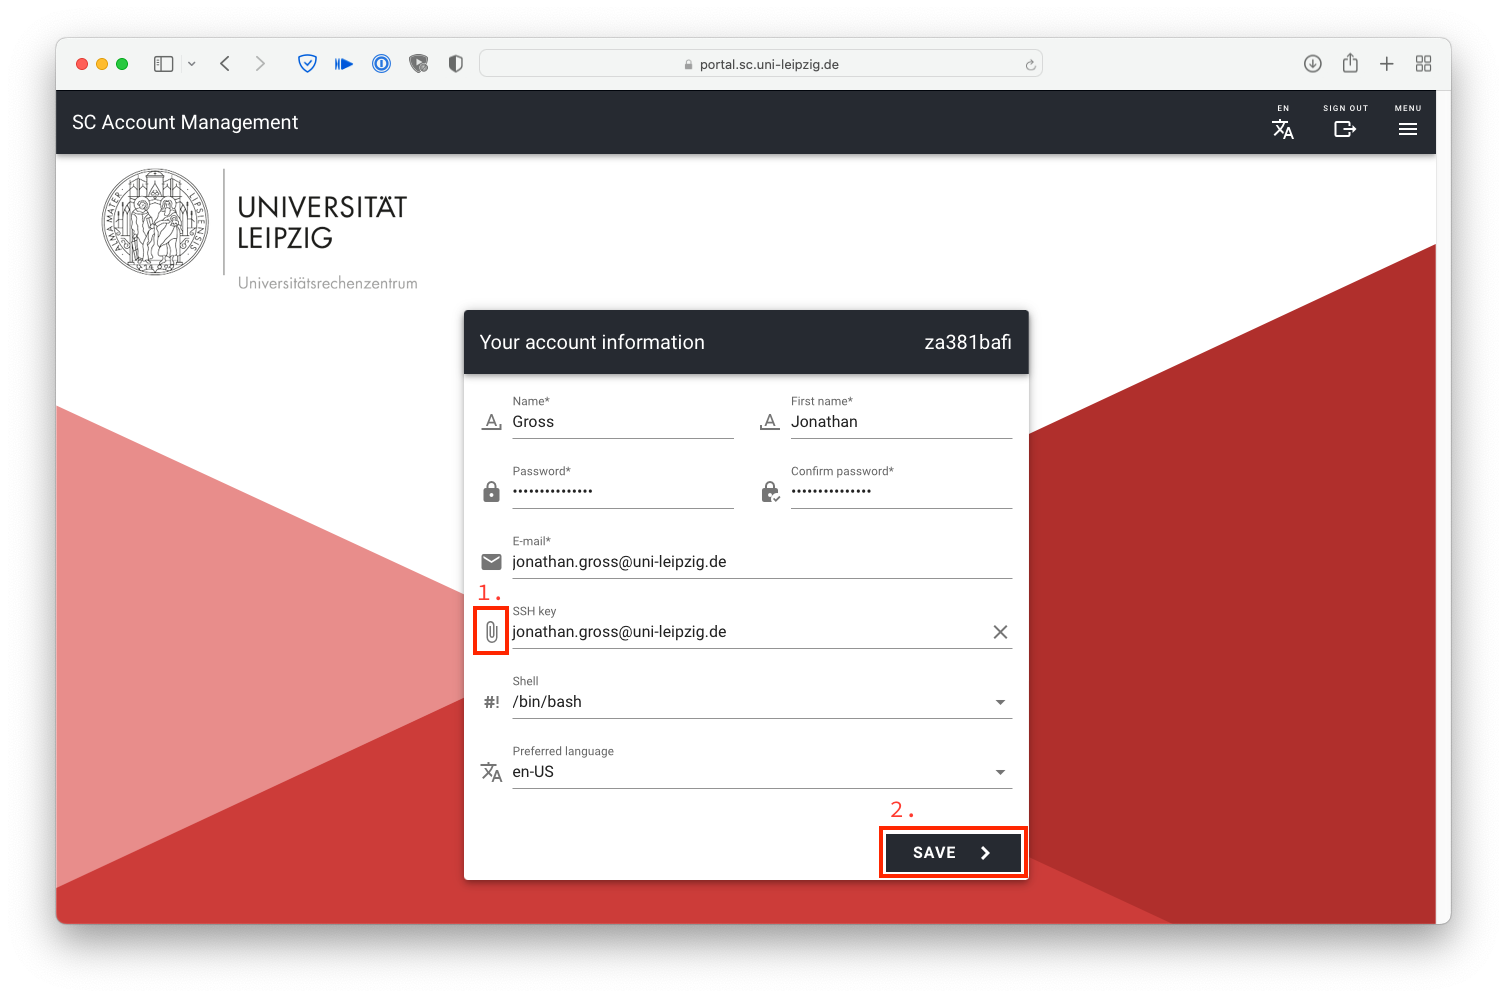
Finally, just hit that SAVE button and you're done!
SSH config file
To make life easier you can configure several options for all host you connect to via SSH and also on a per host basis.
This file is located in your home directory under ~/.ssh/config for macOS and *nix, and %userprofile%\.ssh\config for Windows.
The most basic config would look like this:
With this minimal config you can login to the Clara cluster by just typing ssh login01.
SSH will look for the full hostname in your config file, fetch the username and your uploaded ssh key will take care of the authentication.
You can also set global options for all host with Host * like in the first line in the more advanced example below.
You can enable X11-forwarding, compression, SSH-agent forwarding and more.
Also, notice the two different configs (lines 16-22) for the login01 node using different users.
It also possible to route certain port from the remote to your local computer using port-forwaring (line 27).
This is especially useful if you're using something like Tensorboard.
Host *
  Compression yes
  UseKeychain yes
  AddKeysToAgent yes
  IdentityFile ~/.ssh/id_ed25519
  ServerAliveInterval 120
  ForwardAgent yes
  ForwardX11 yes
  ForwardX11Trusted yes
  XAuthLocation /opt/X11/bin/xauth

Host galaxy101
  Hostname galaxy101.sc.uni-leipzig.de
  User za975bxfi

Host sc-login01
  Hostname login01.sc.uni-leipzig.de
  User za975bxfi

Host sc-login01-admin
  Hostname login01.sc.uni-leipzig.de
  User admjonathan

Host sc-lab02-admin
  Hostname lab02.sc.uni-leipzig.de
  User admjonathan
  LocalForward 8000 lab02.sc.uni-leipzig.de:8000
Tip
Use man ssh_config to get detailed information on all the options above and many many more.
Troubleshooting connection issues
If you have trouble connecting to our services, please check if you have Docker running.
Docker's default local IP address pool is overlapping with some of our internal IP adresses, e.g. 172.18.0.0/16.
To check if Docker causes your connection problems, try connecting again while your local Docker service is stopped.
In order to permanently fix the overlapping IP issue, you need to adjust you local docker config.
This is typically found at /etc/docker/daemon.json on a Linux system.
Find the block that reads "default-address-pools" and adjust is to something similar to:
After that, you need to restart the Docker service on your computer. It may also be necessary to recreate your networks. You can remove all network configurations by executing docker network prune.